How to publish a product through the portal interface, managing product specifications
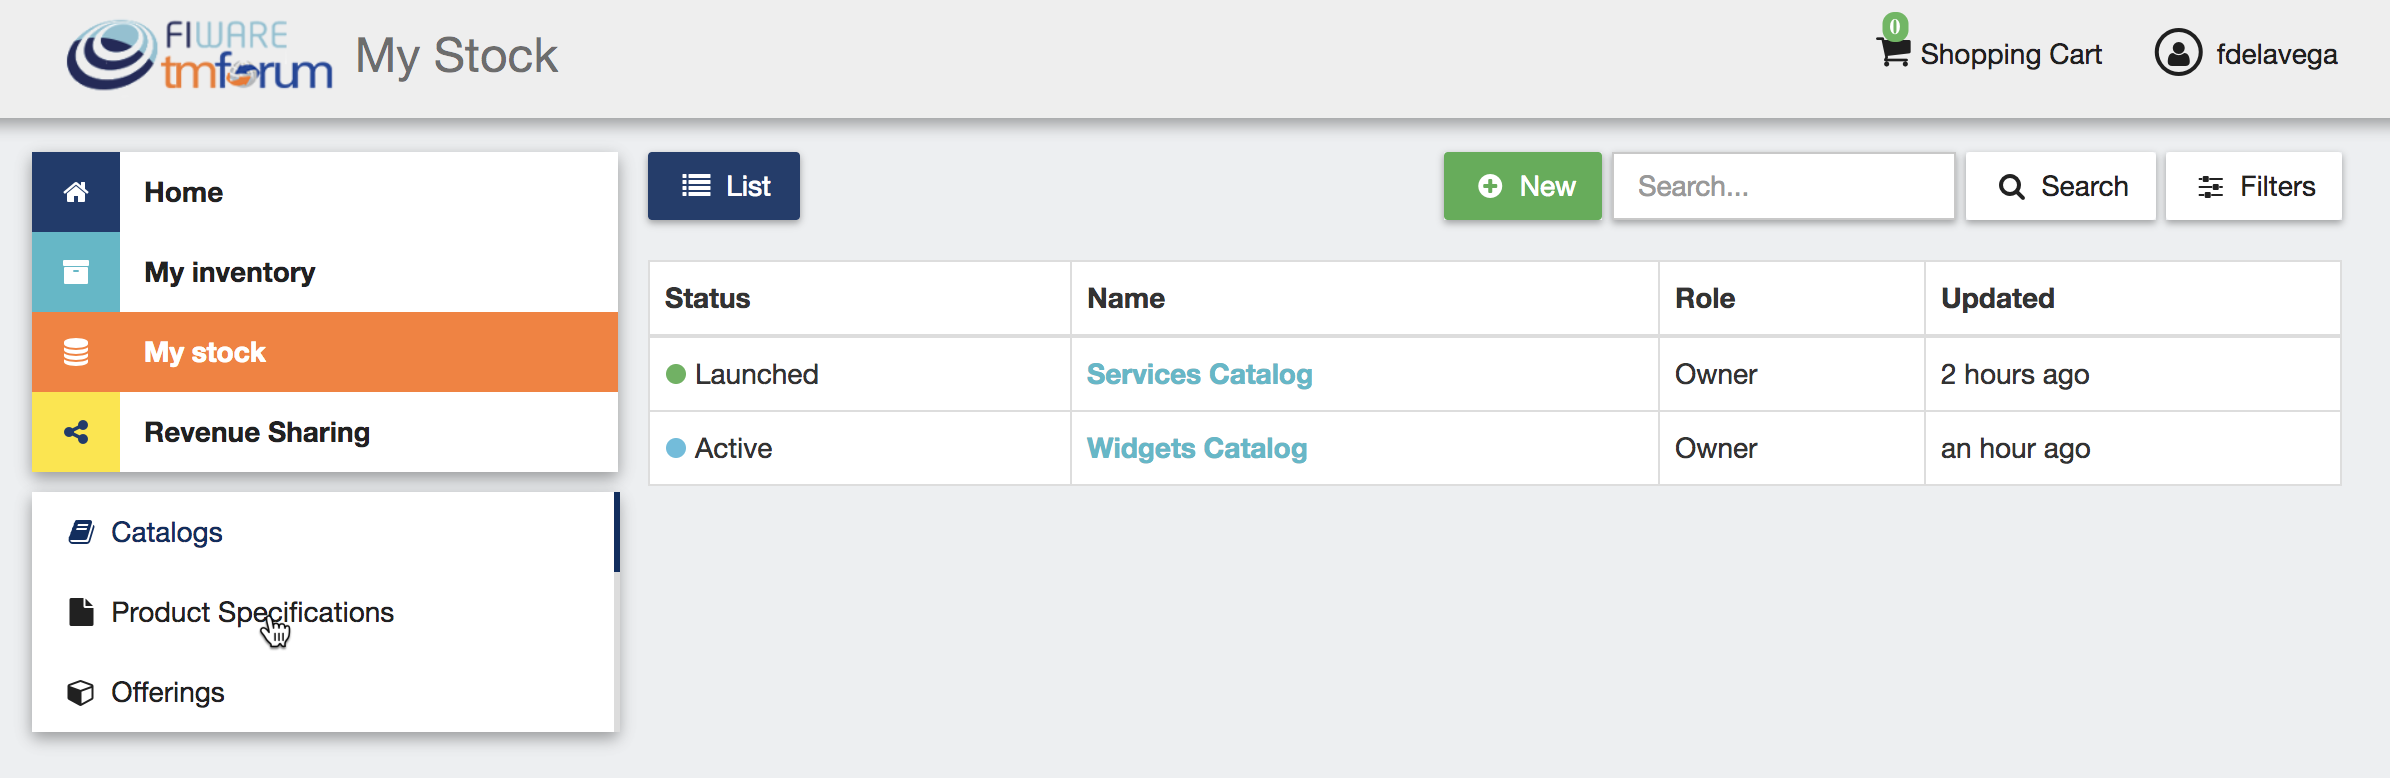
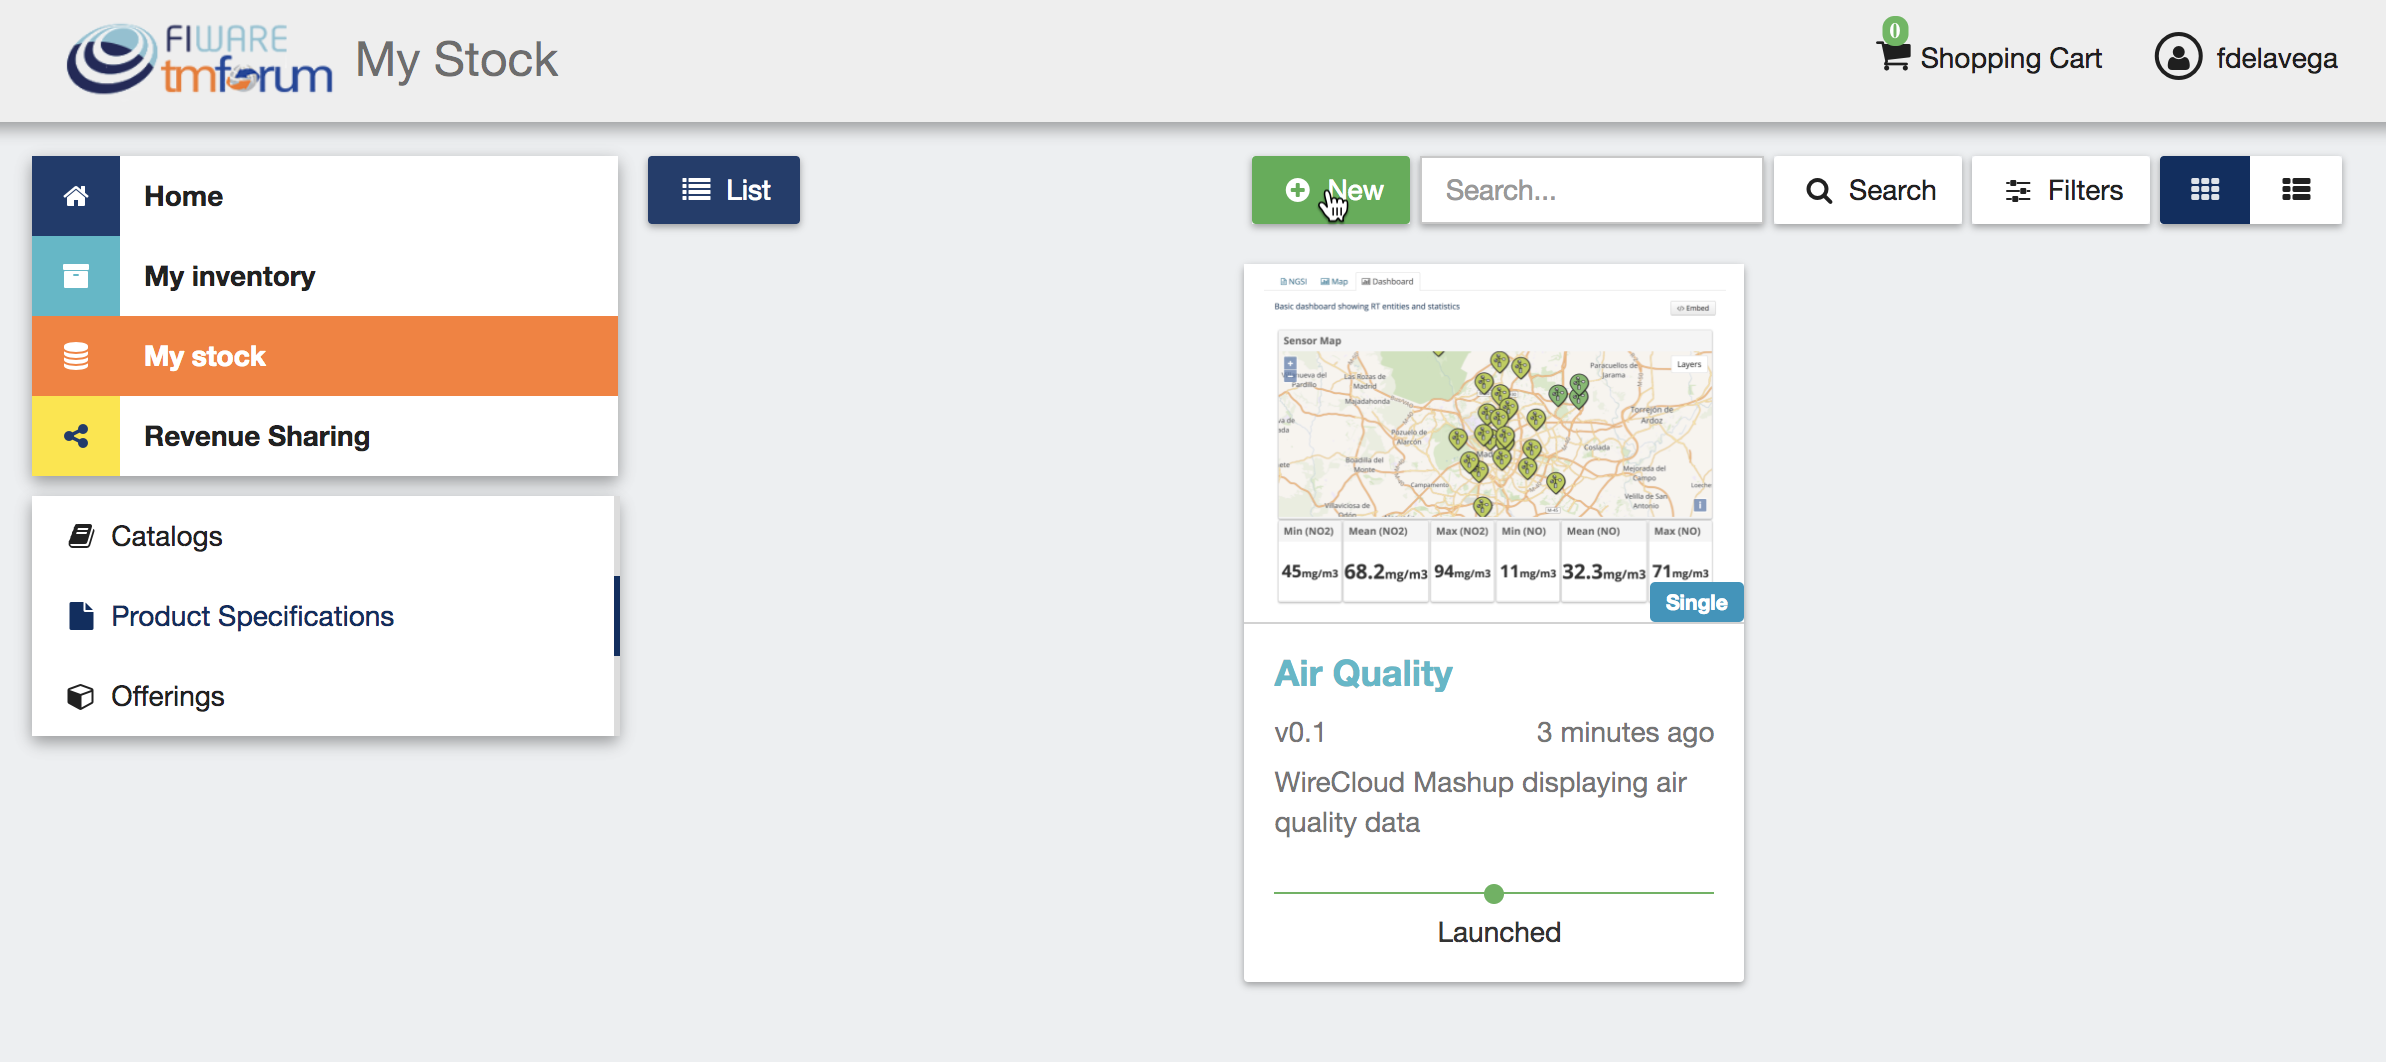
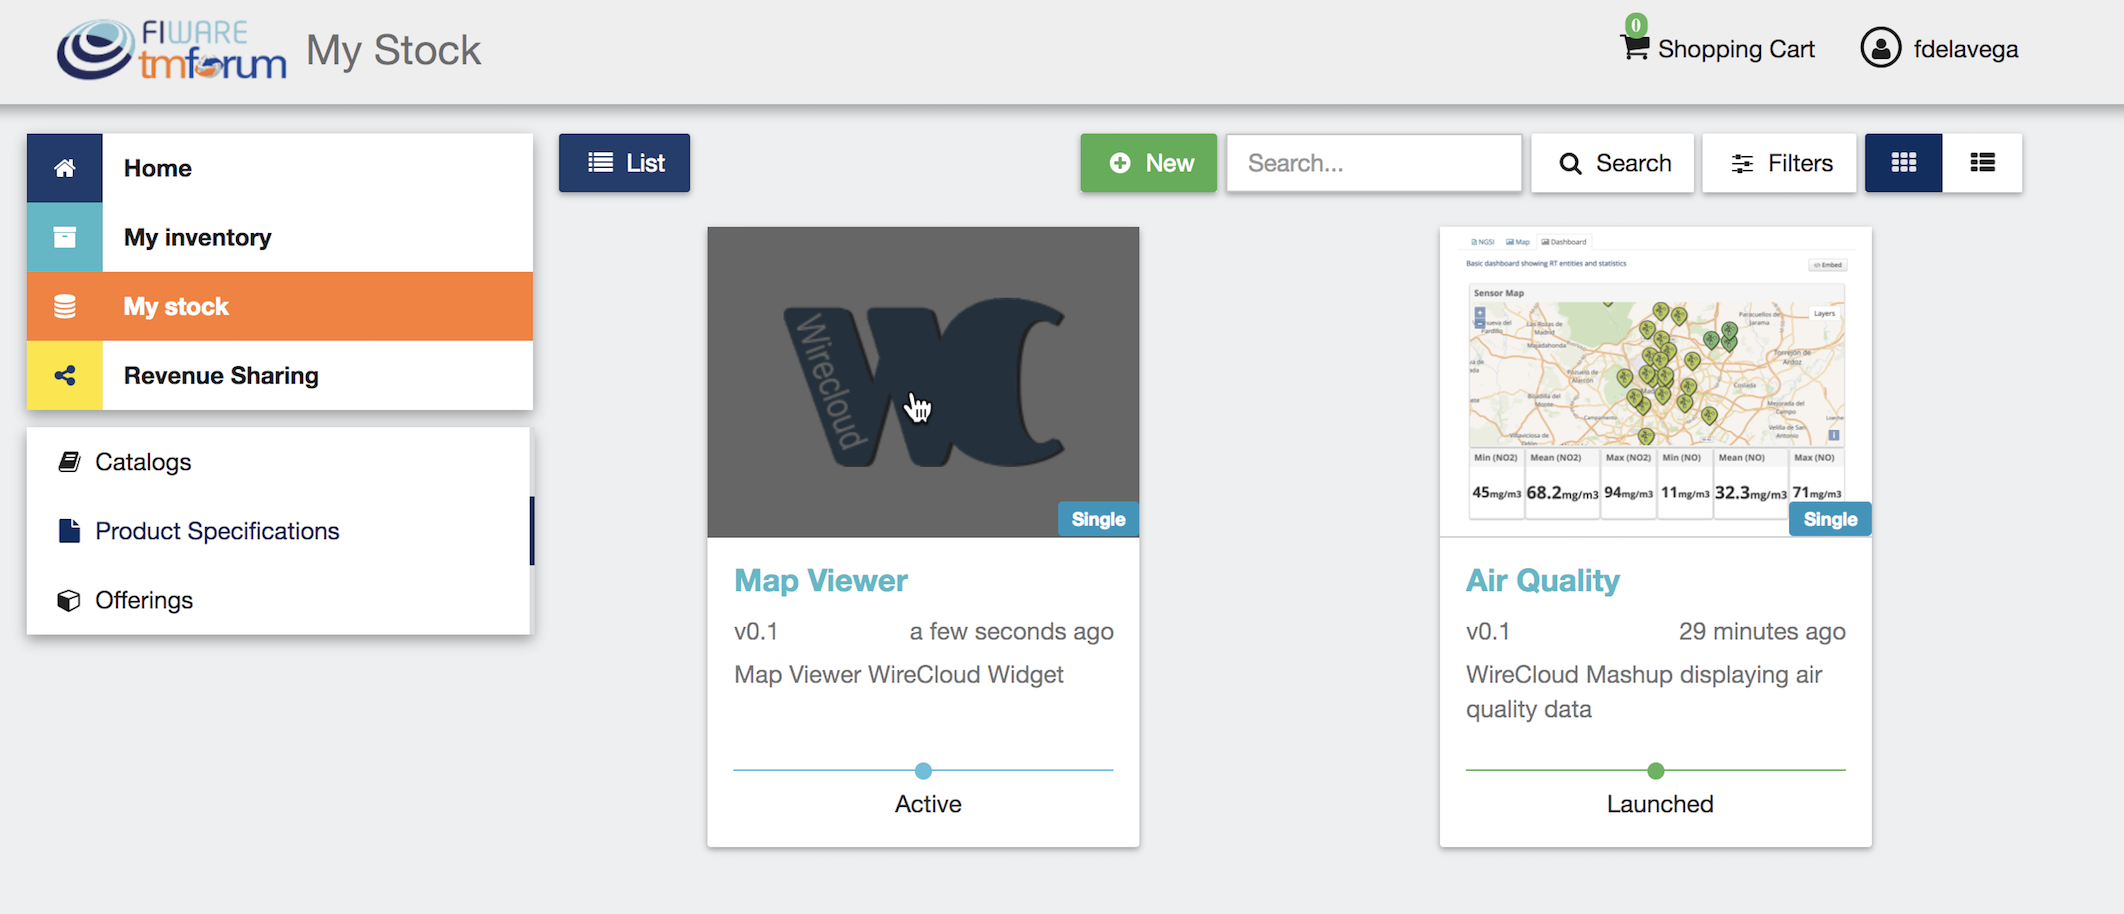
Product Specifications represent the product being offered, both digital and physical. To list your product specifications go to My StockOfferings section and click on Product Specifications.
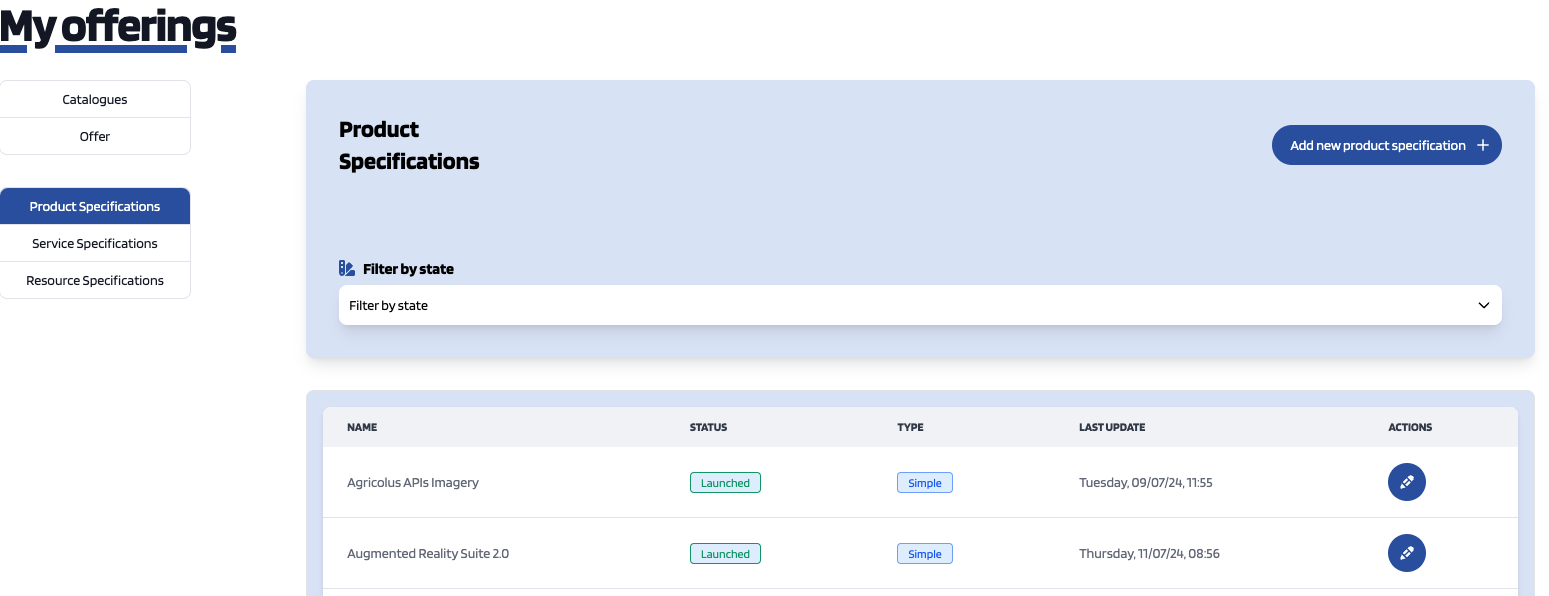
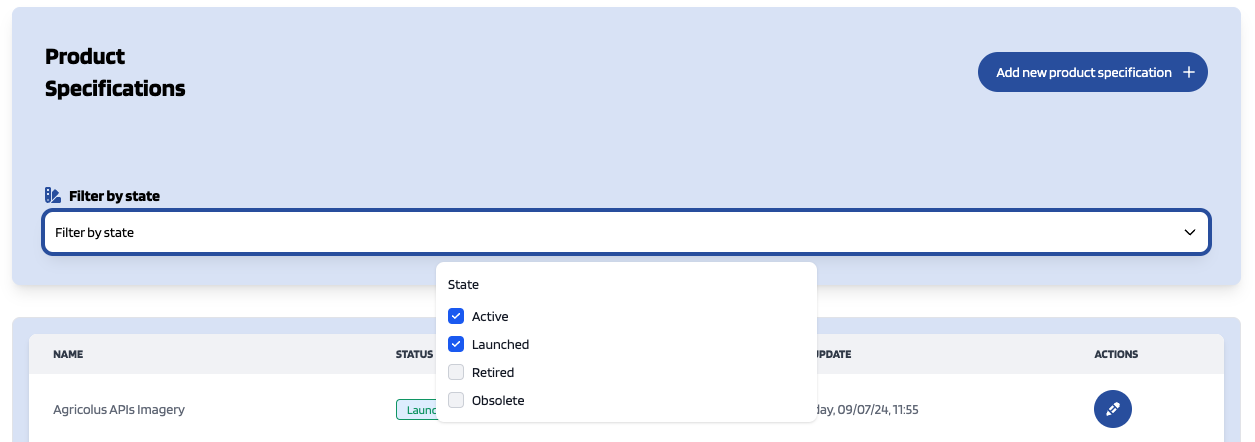
In the same way as catalogs,catalogues, services and resources, product specifications can be searched by keyword, sorted, or filtered by statusstate andby whether they are bundles or not. To filter or sort product specifications, clickclicking on FiltersFilter by state, chooseand choosing the appropriate properties, and click on Closeproperties.

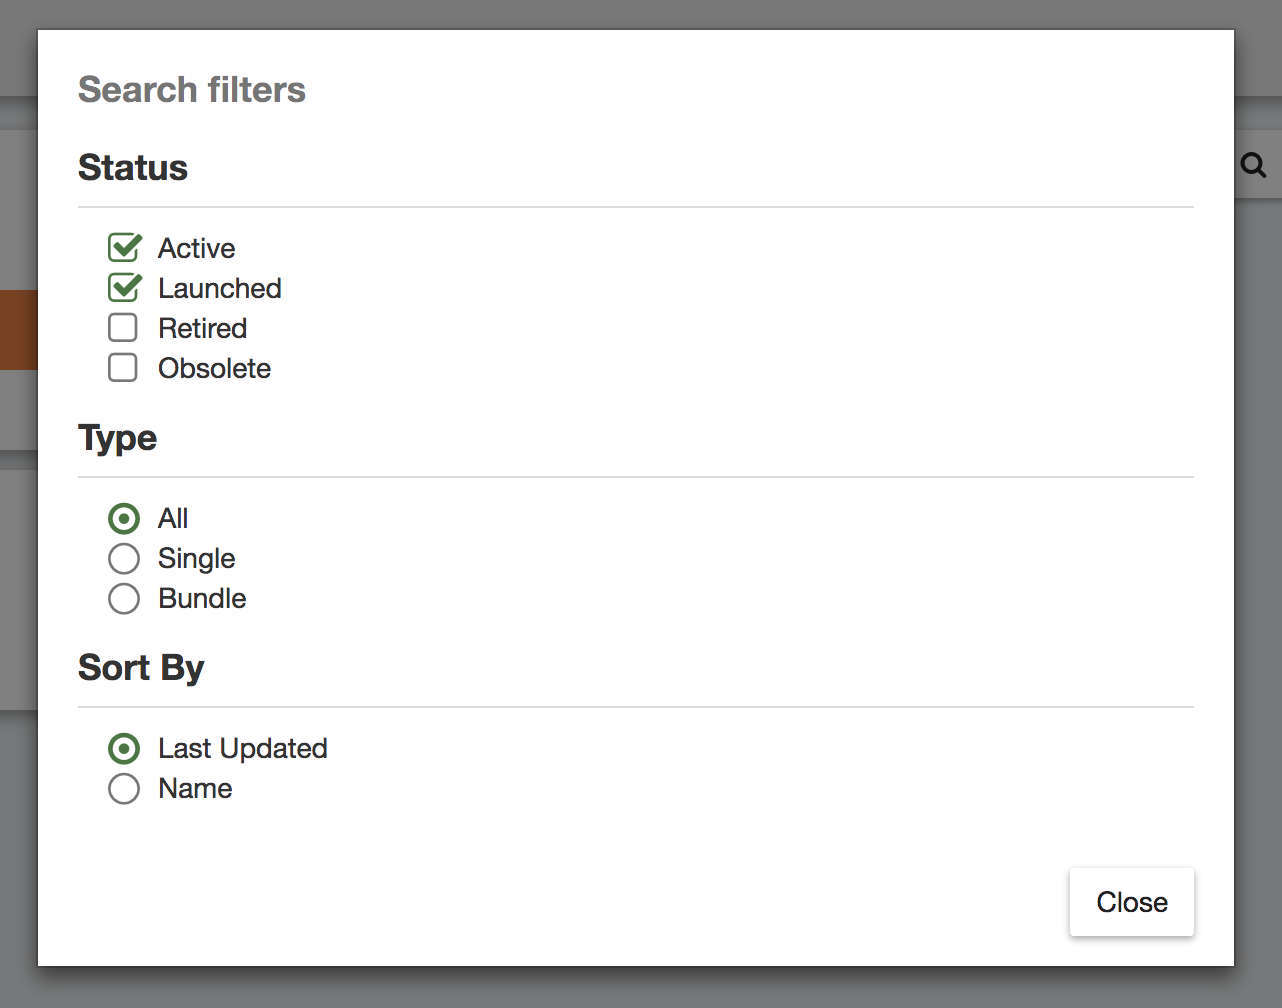
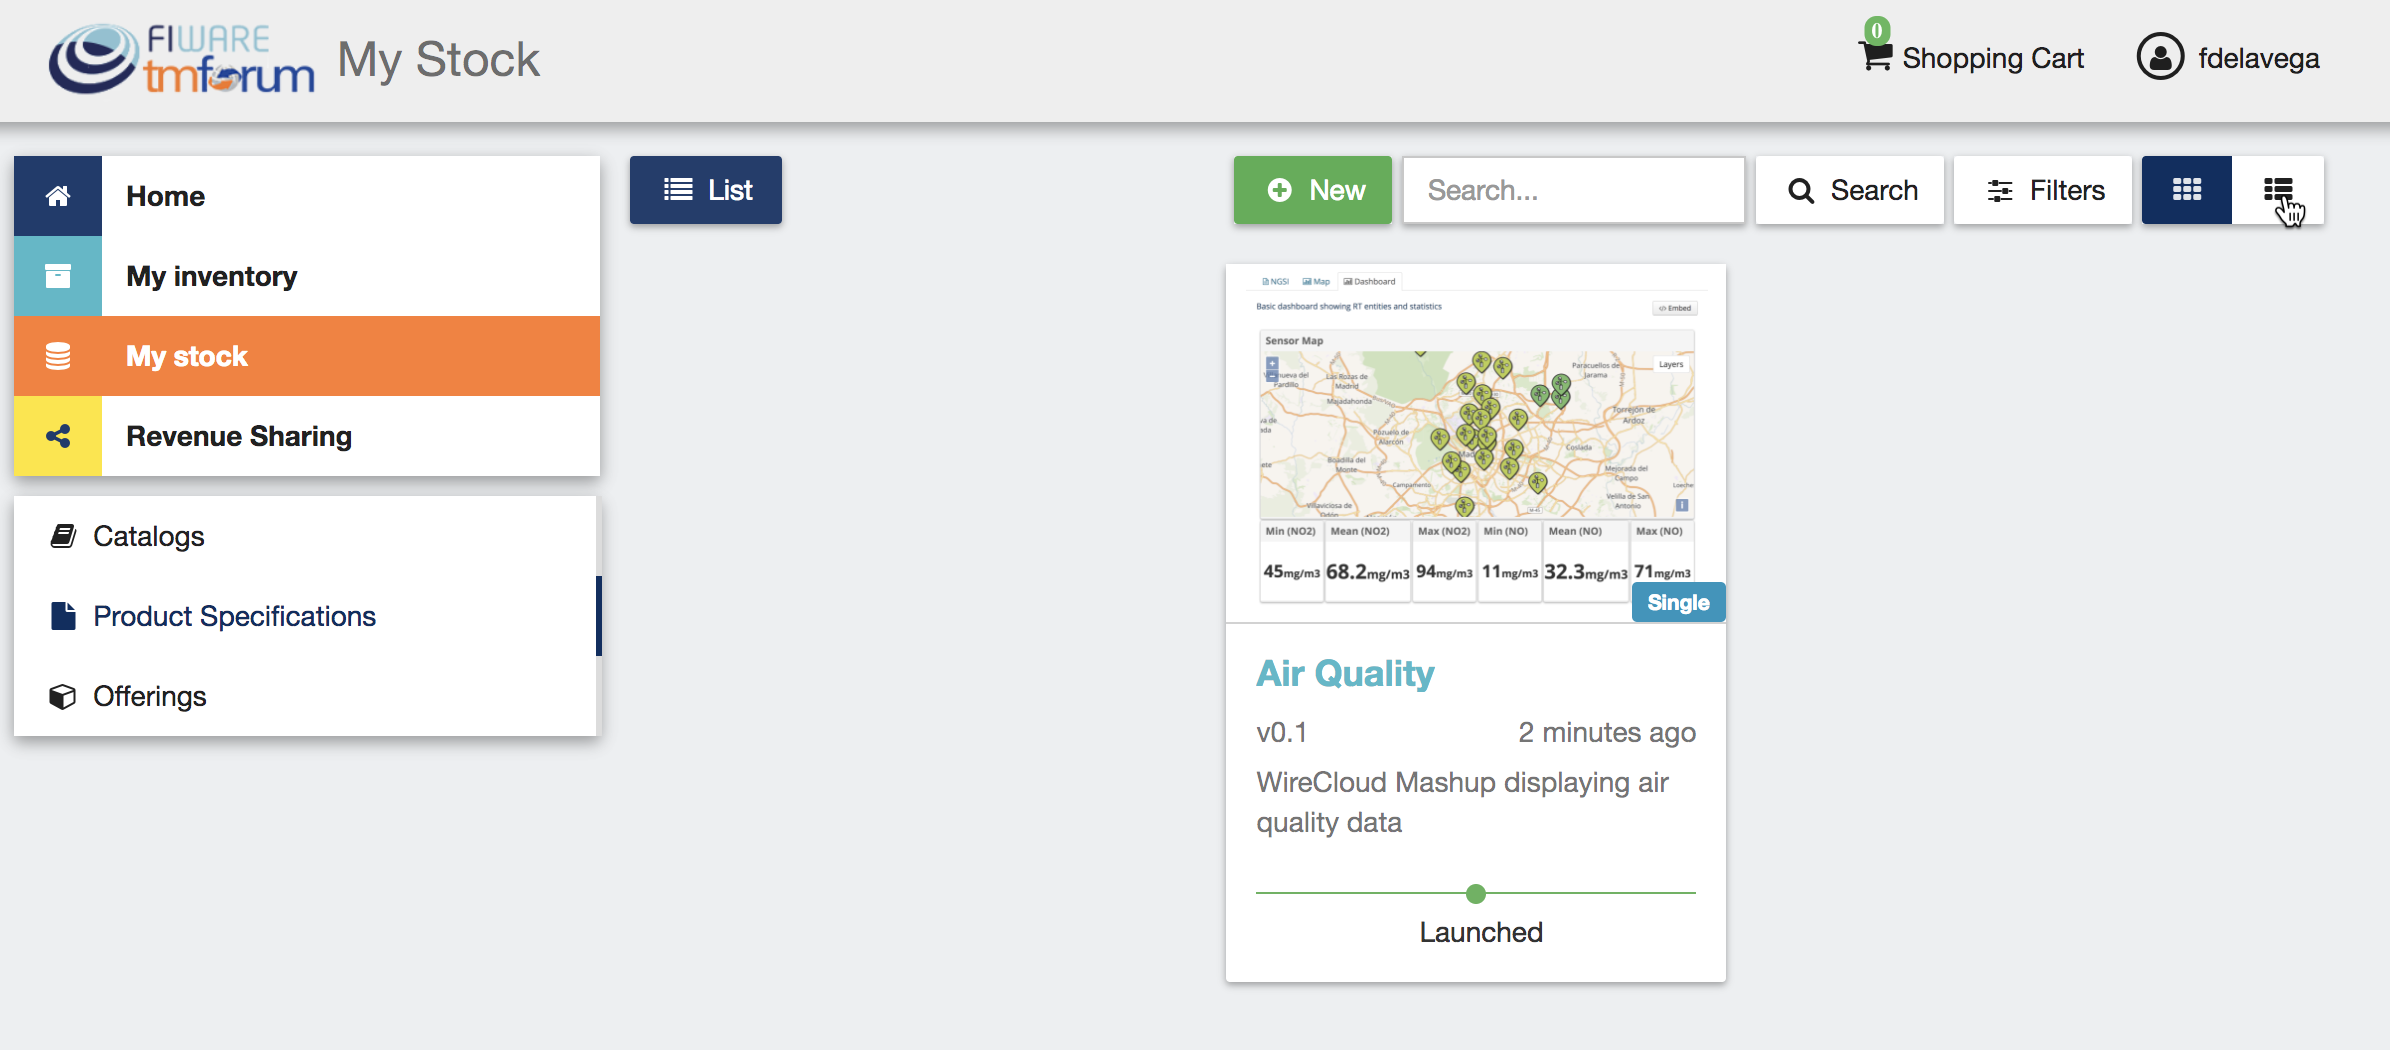
Additionally, it is possible to switch between the grid view and the tabular view using the provided buttons.
To create a new product specification click on NewAdd new product specification.
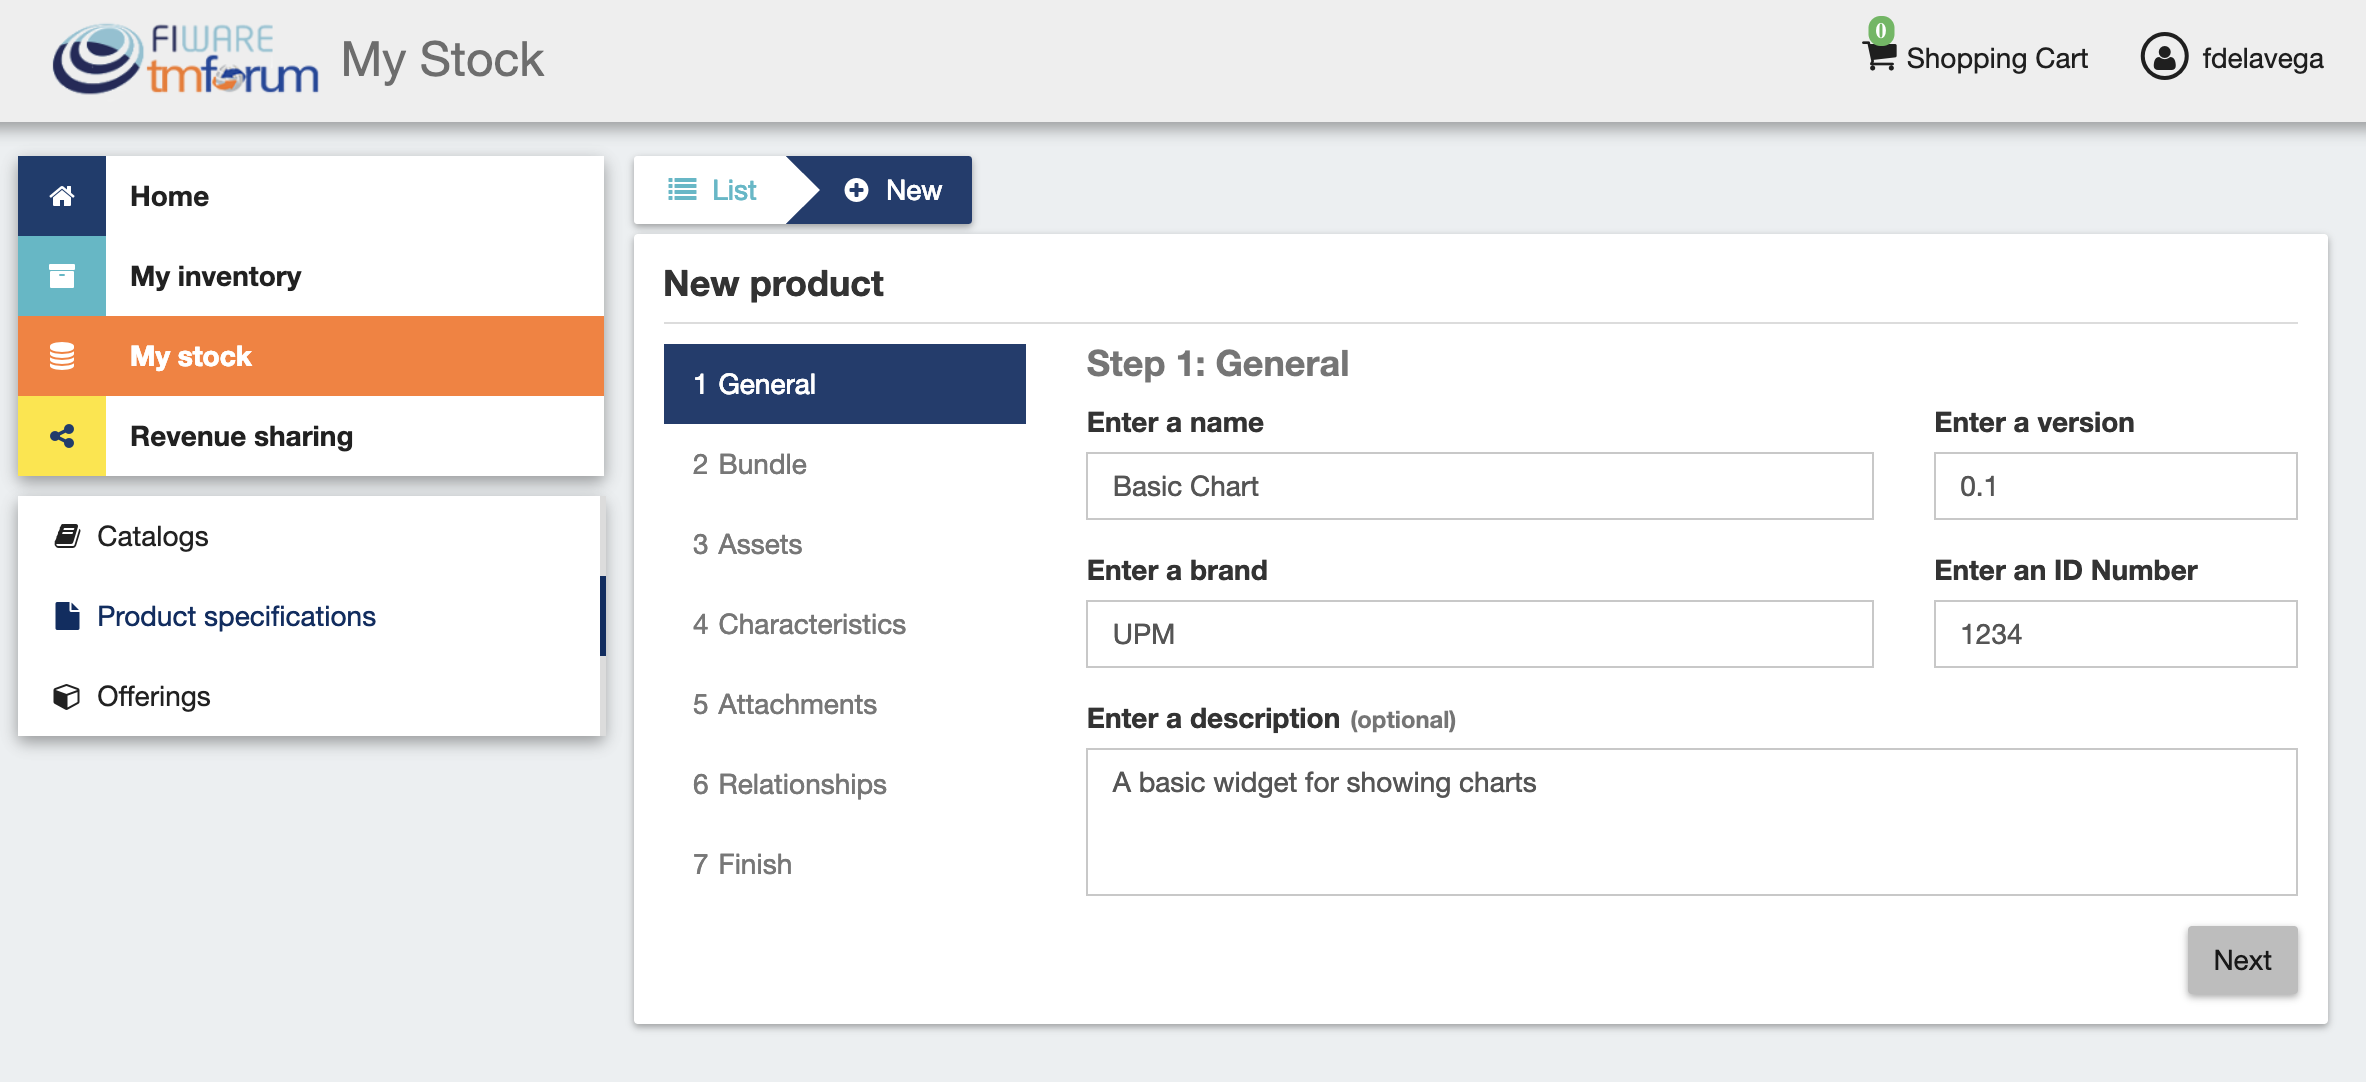
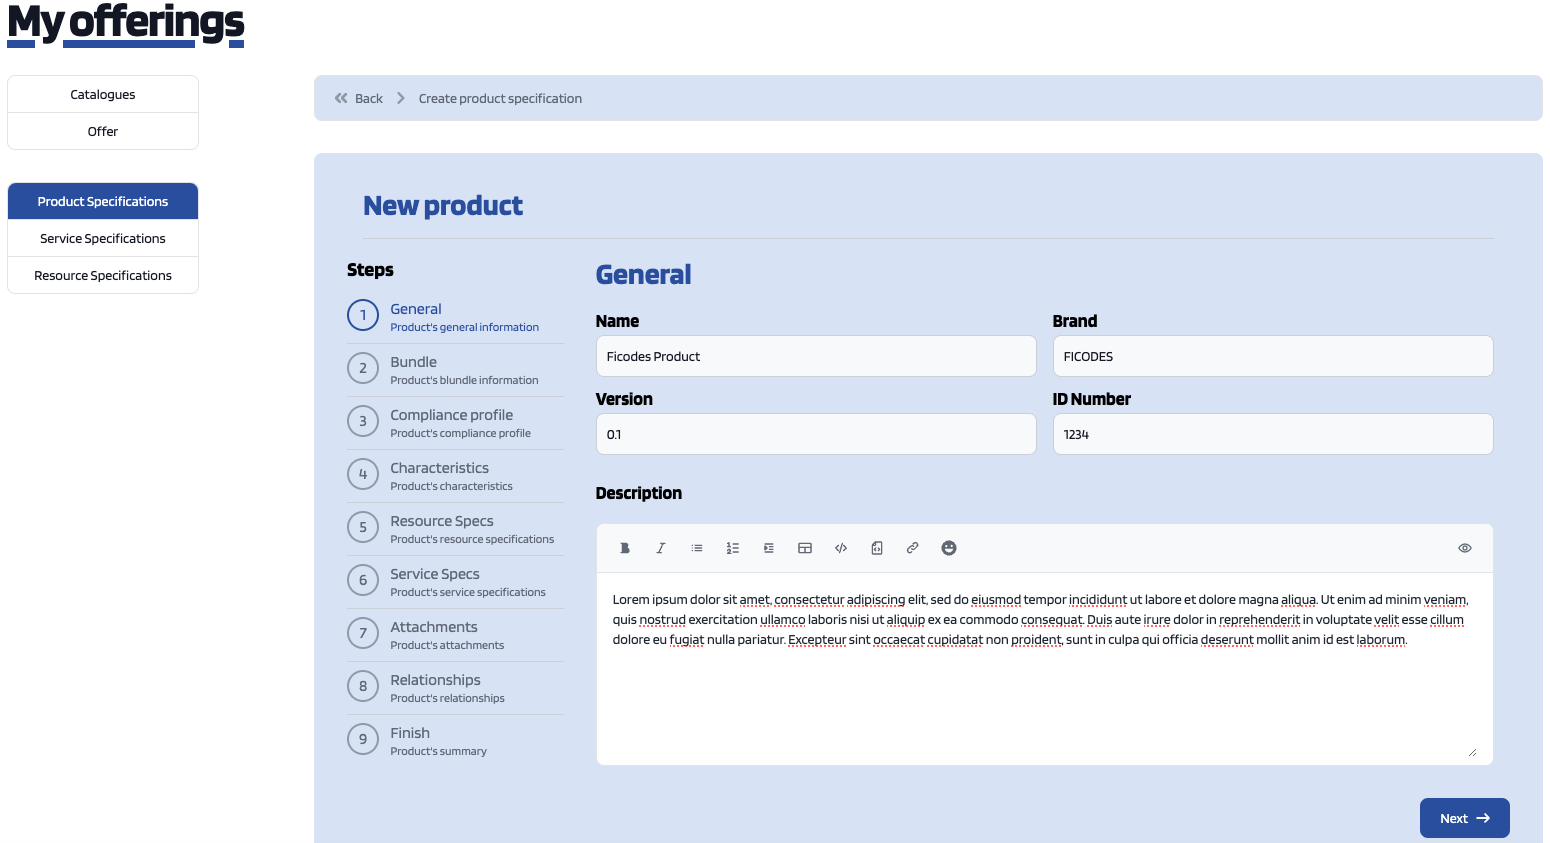
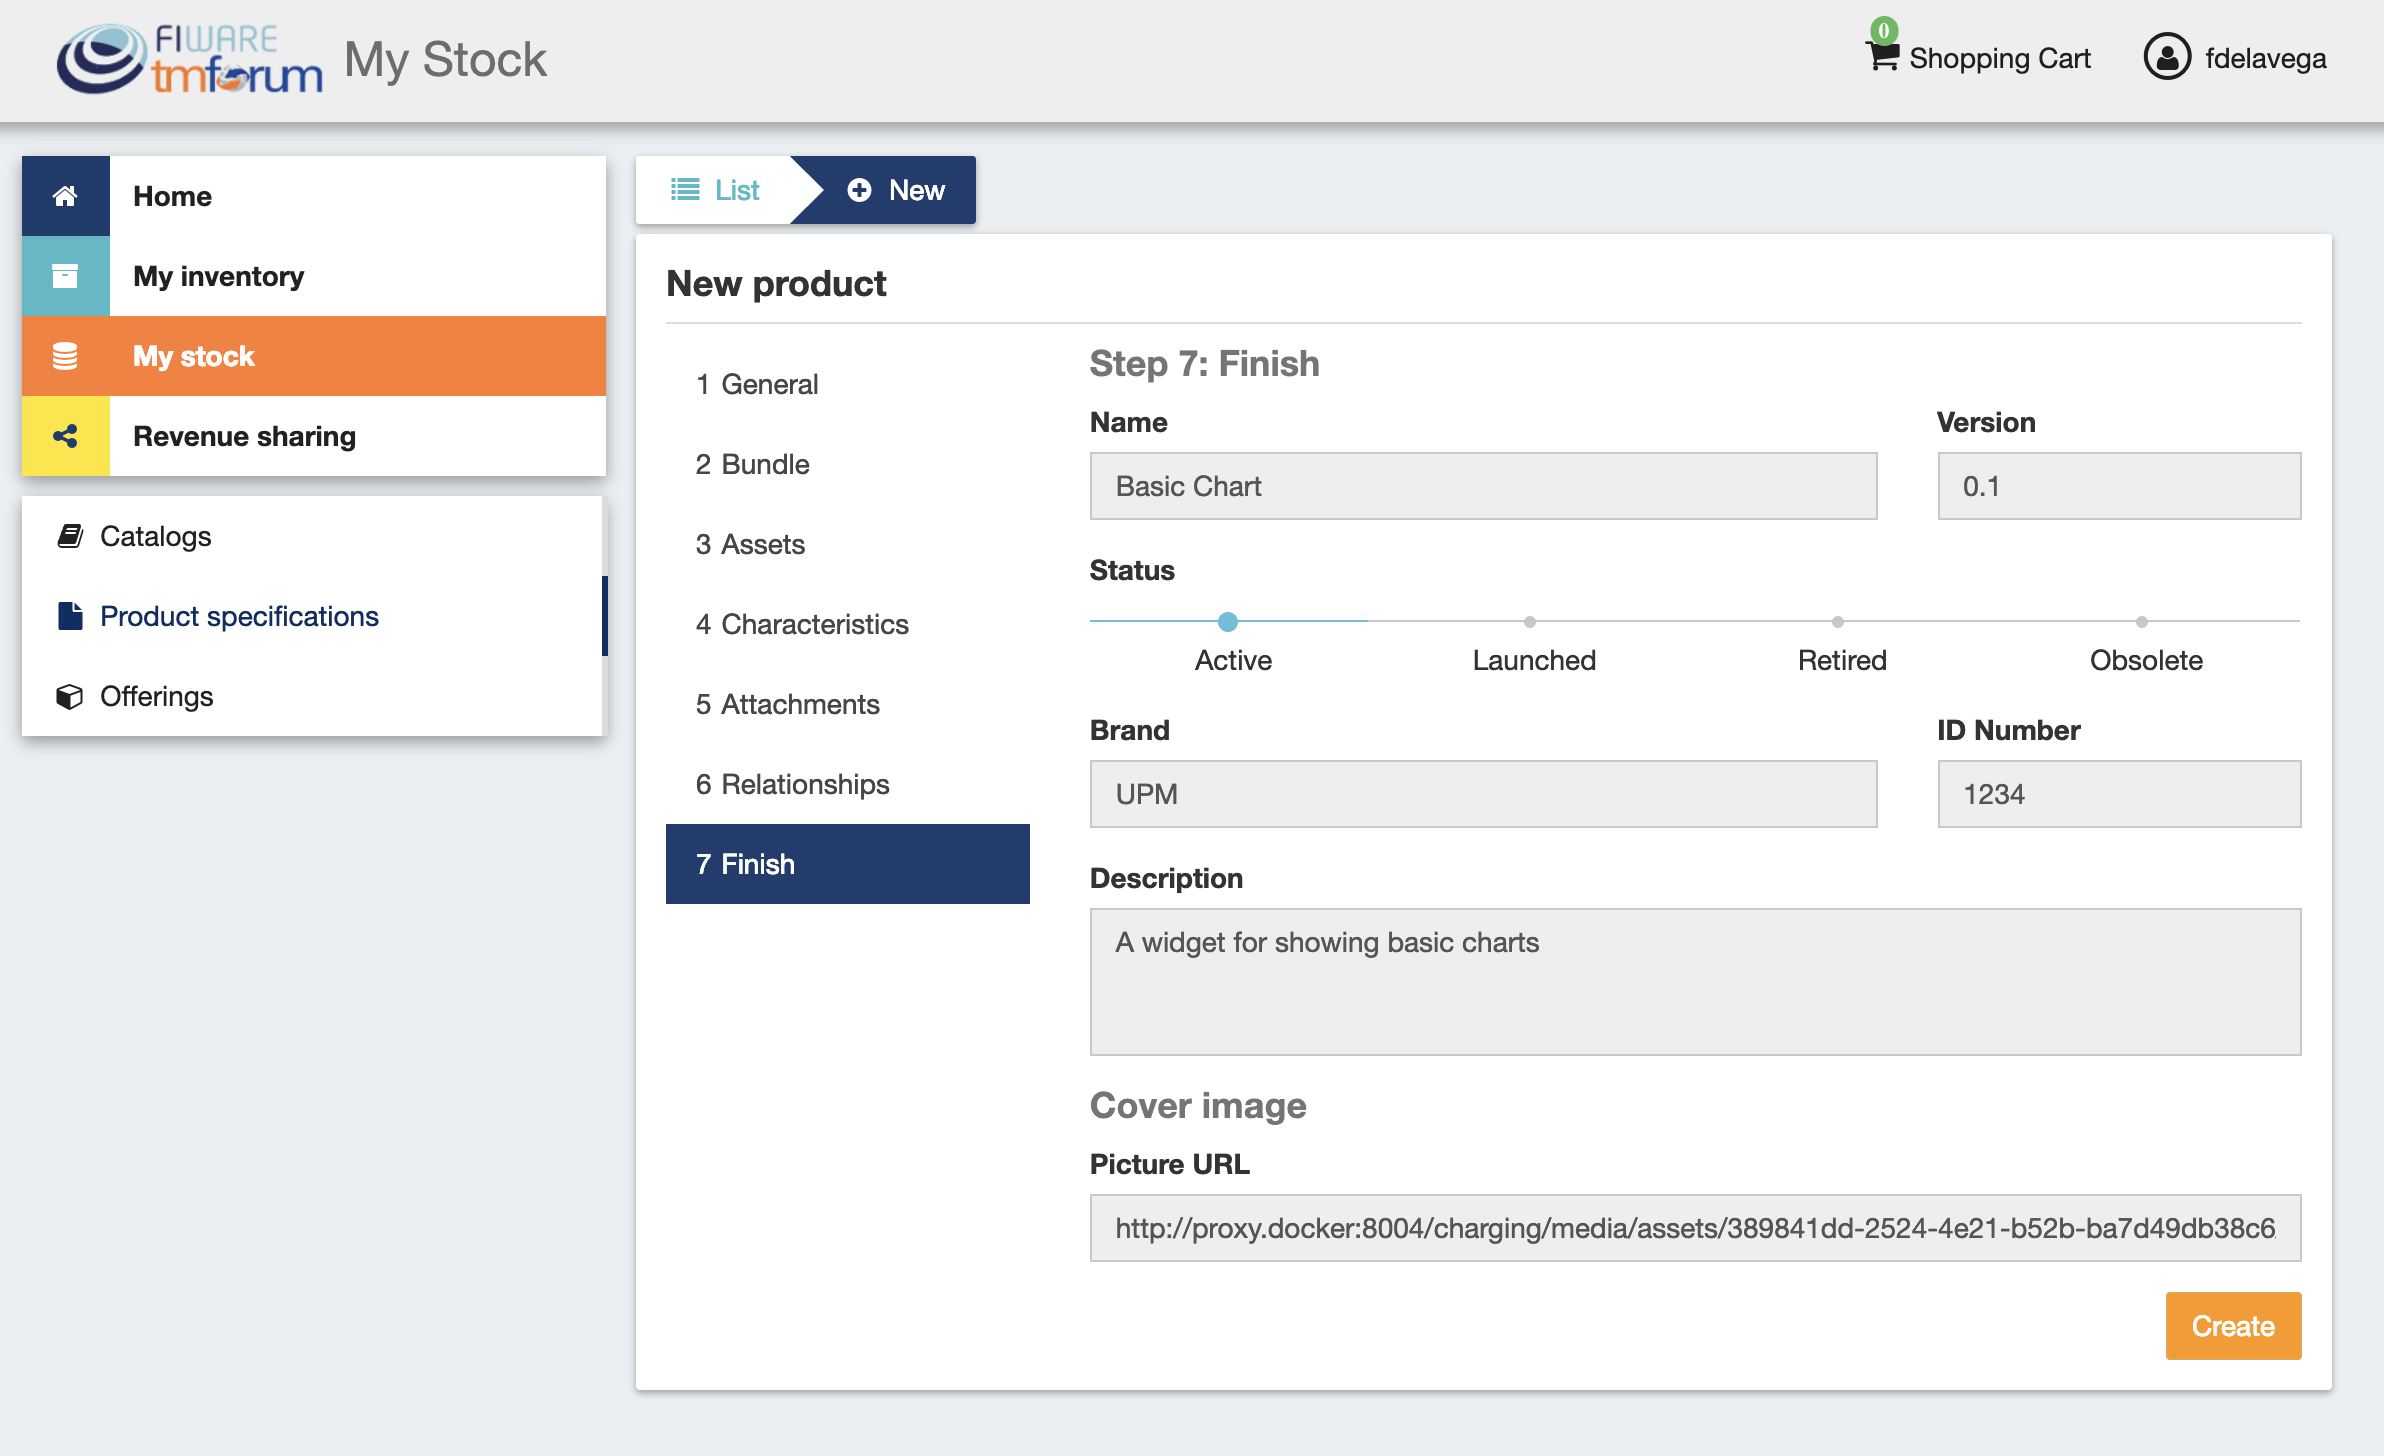
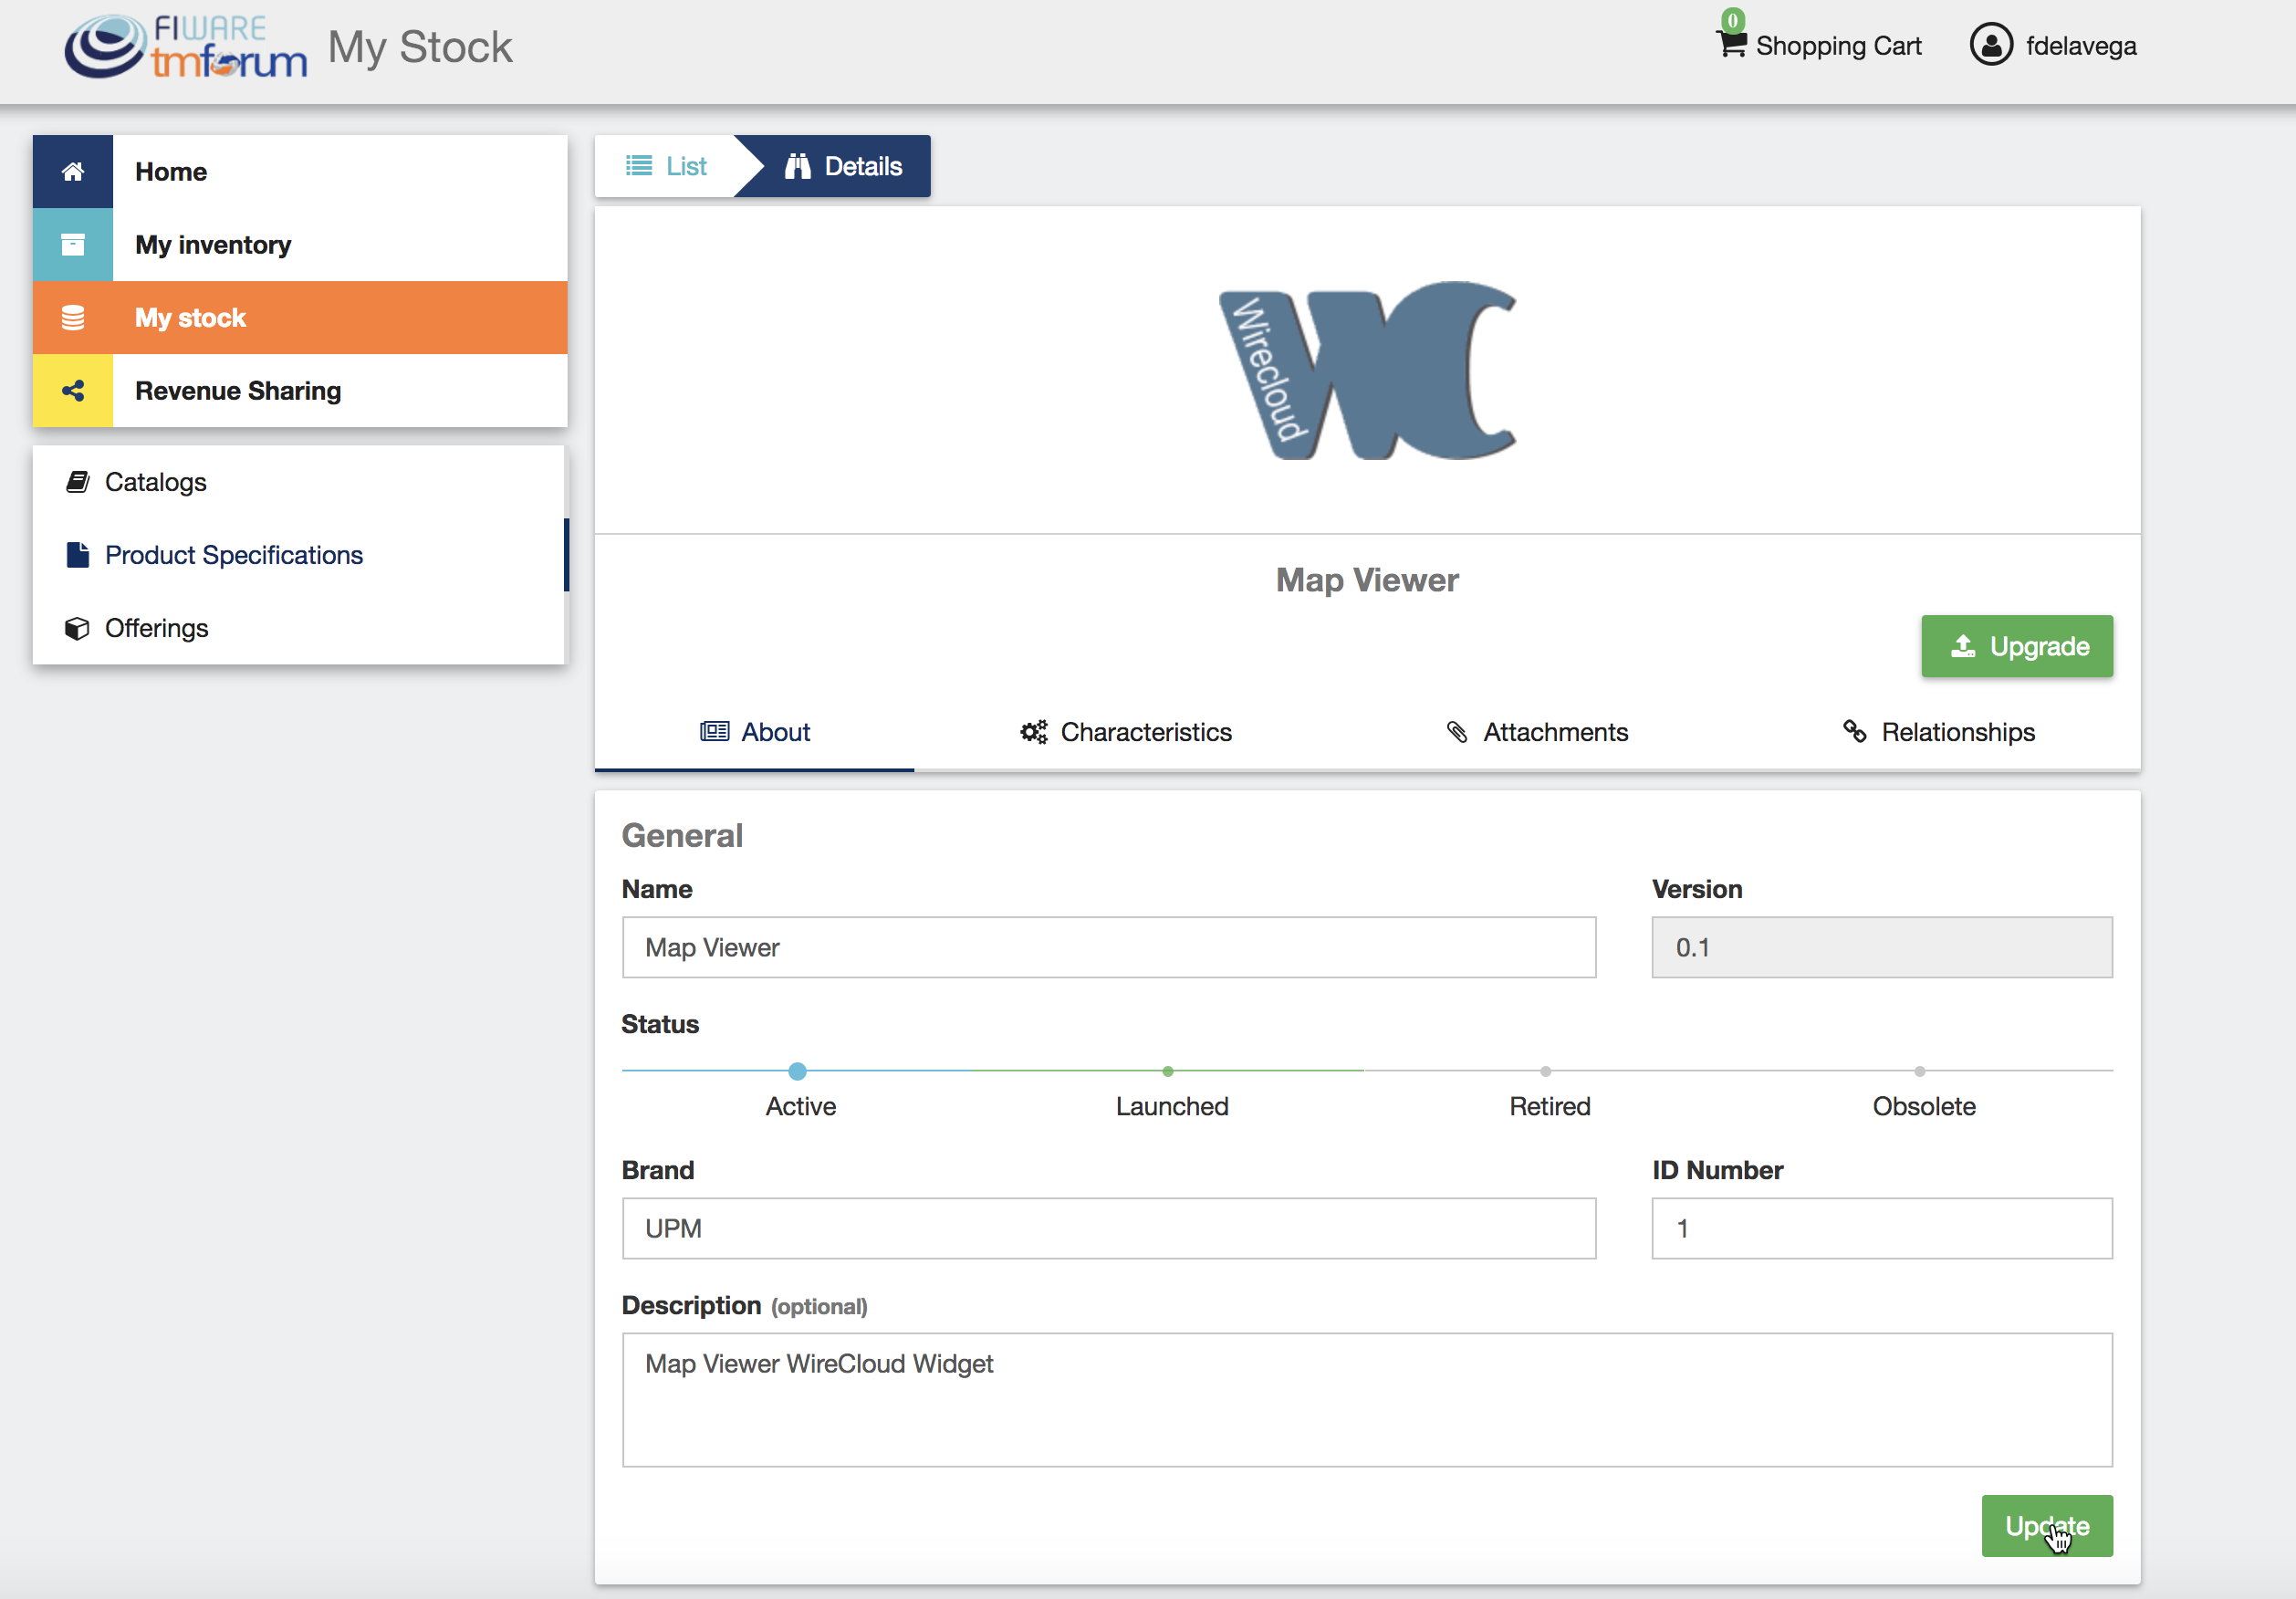
product specification creation form has several steps. In the displayed view, provide the general information of the product spec. including its name, version, and an optional description. In addition, you have to include the product brand (Your brand), and an ID number which identifies the product in your environment. Then, click on Next.
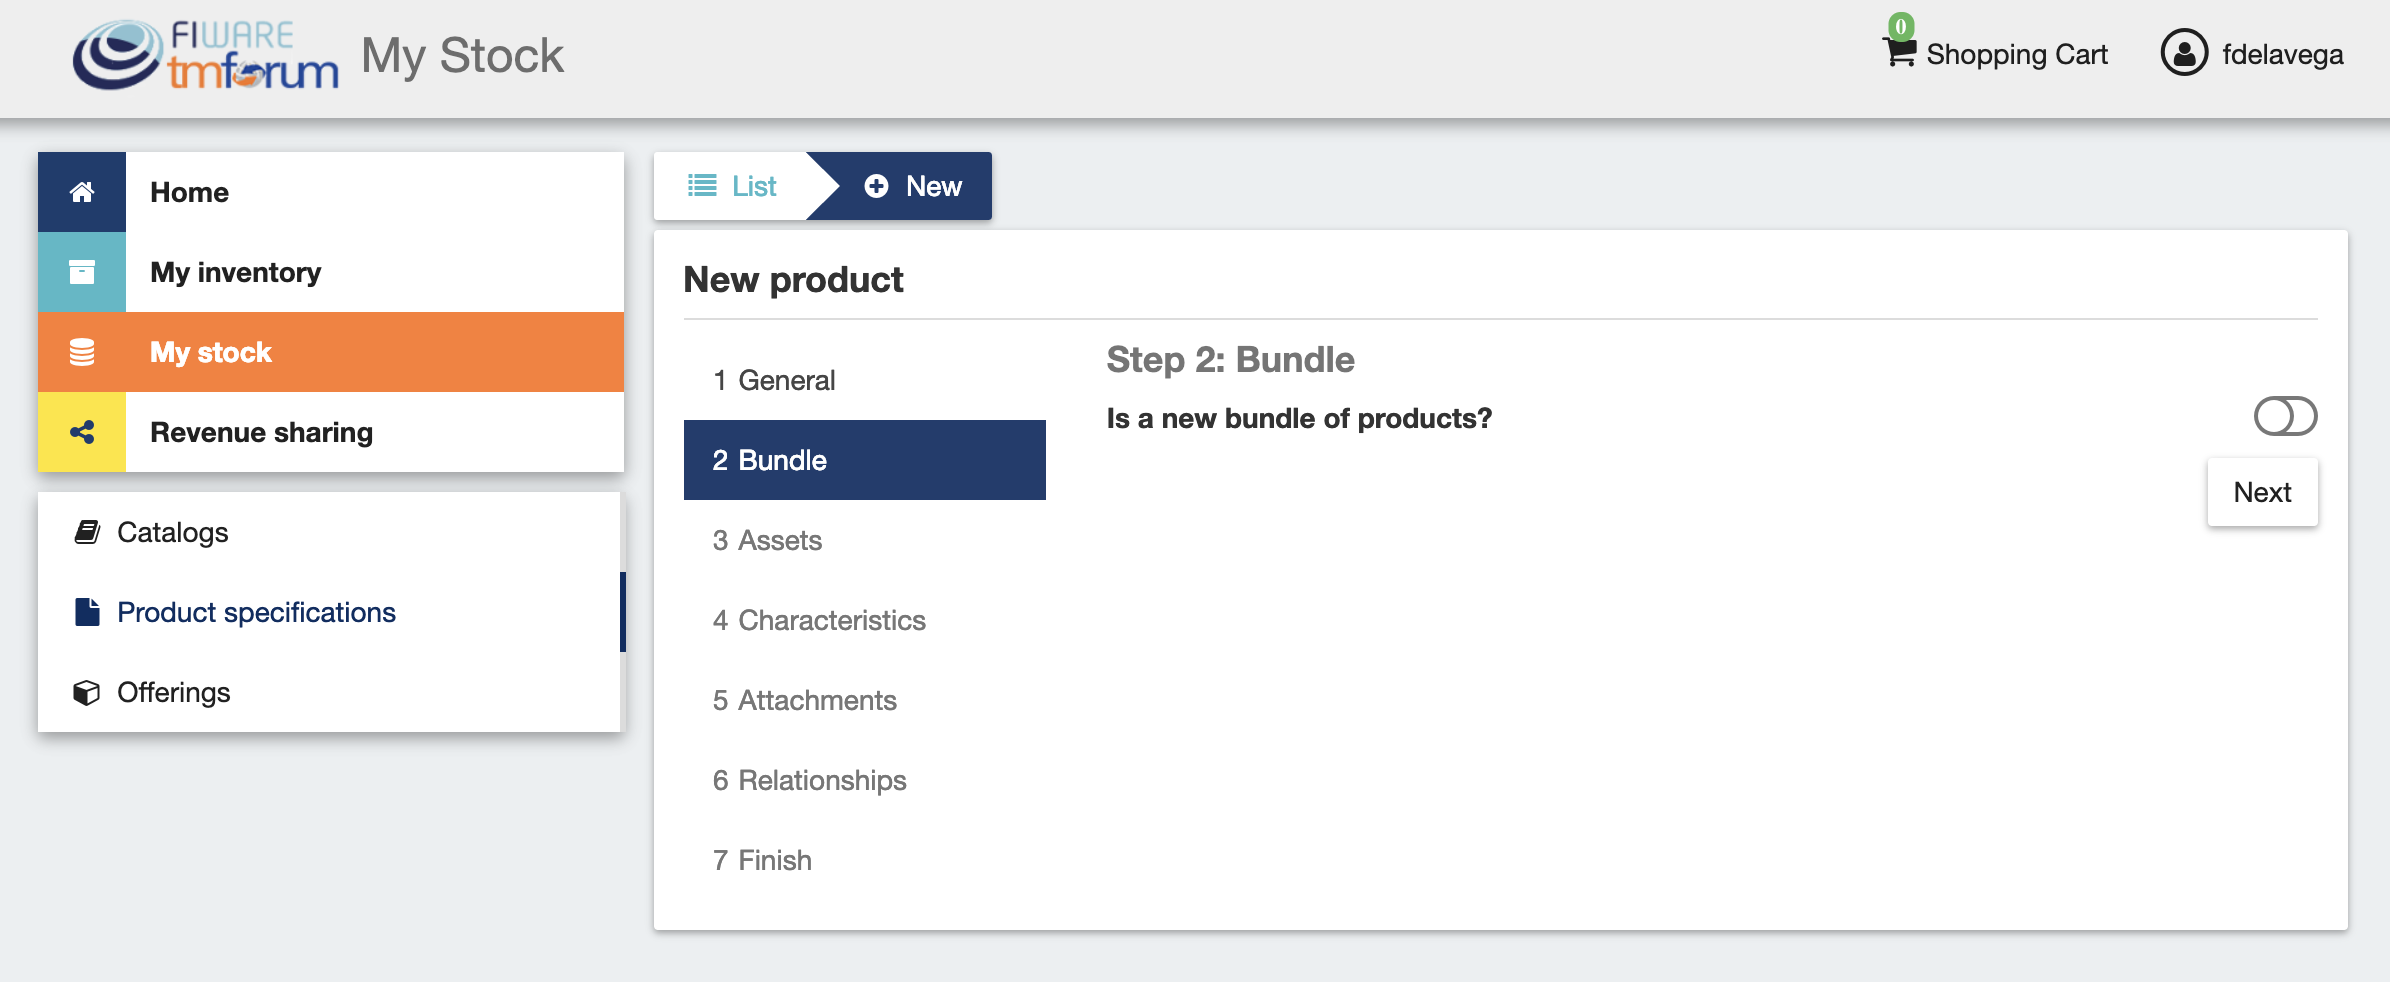
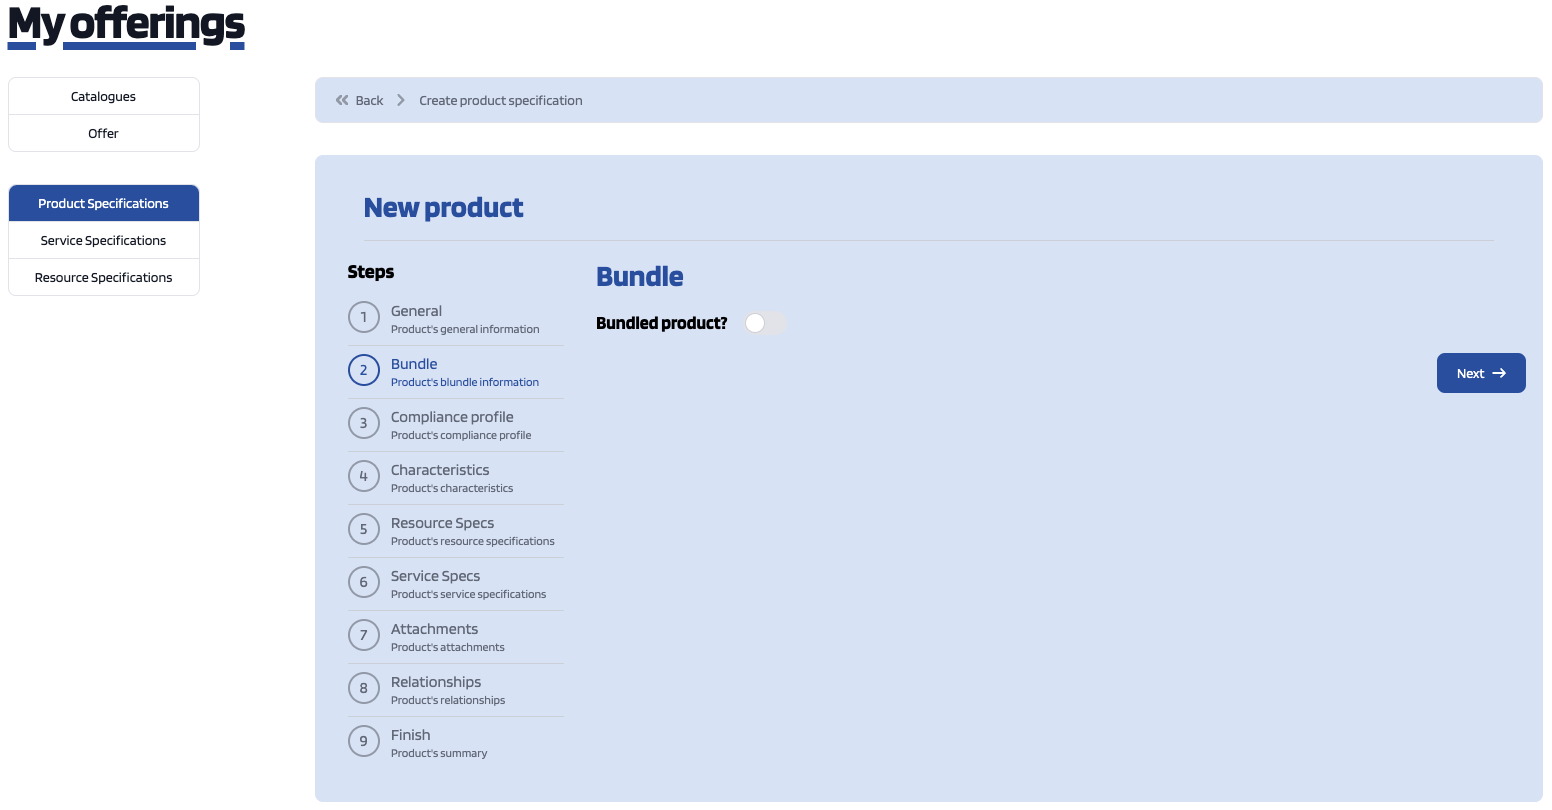
In the next step, you can choose whether your product specification is a bundle or not. Product bundles are logical containers that allow you to sell multiple products as if it were a single one. Once you have selected the right option click on Next.
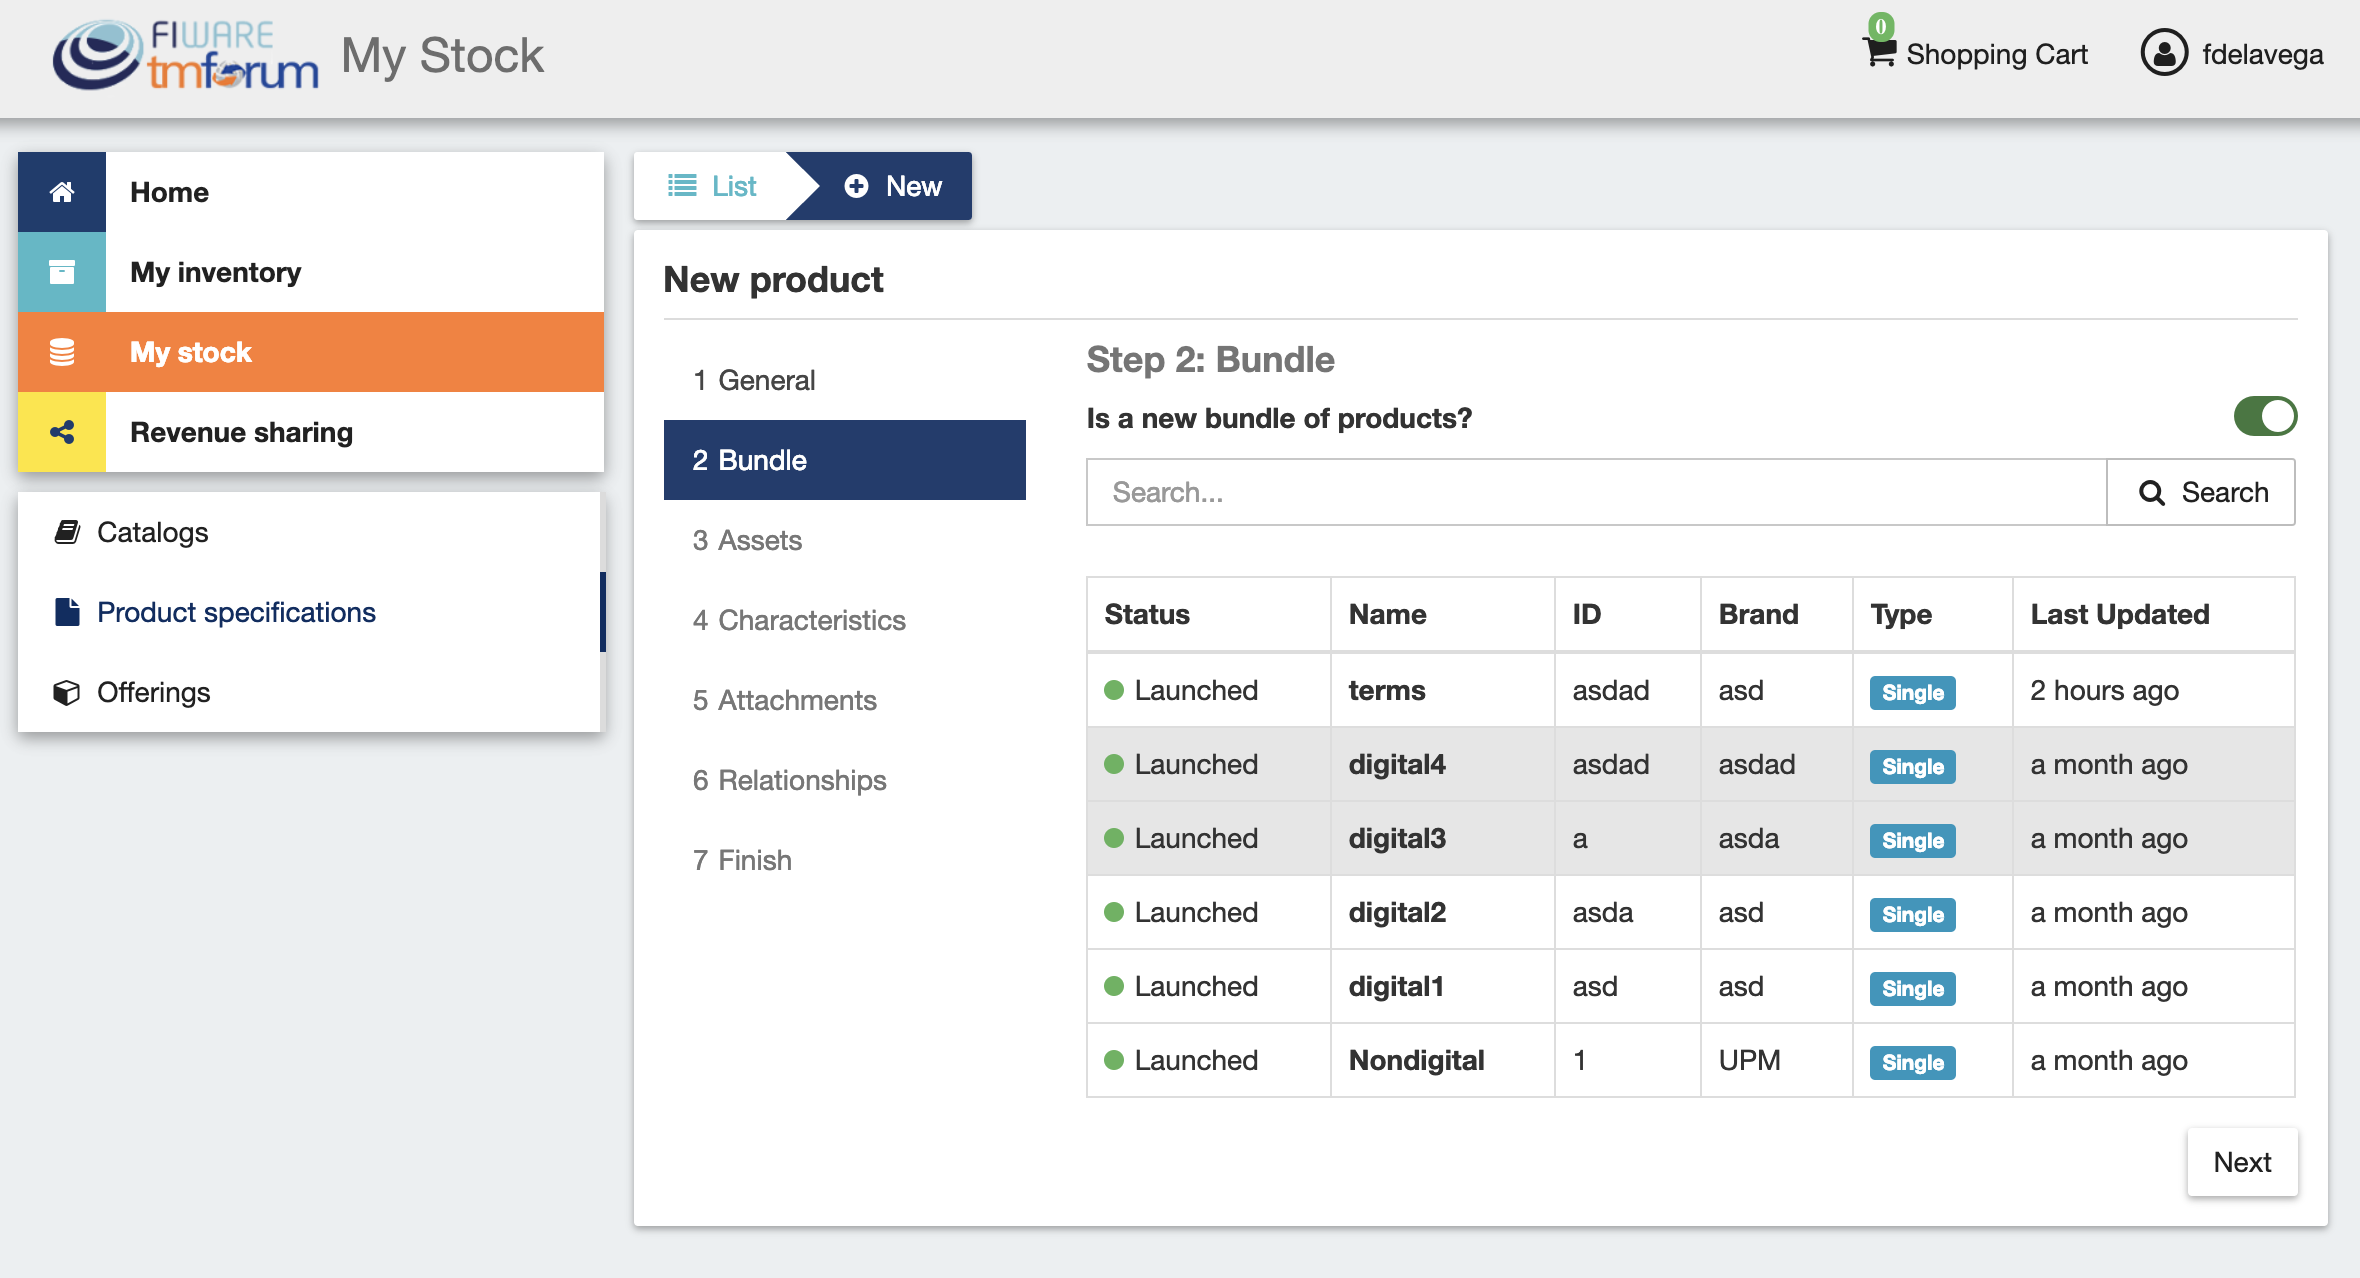
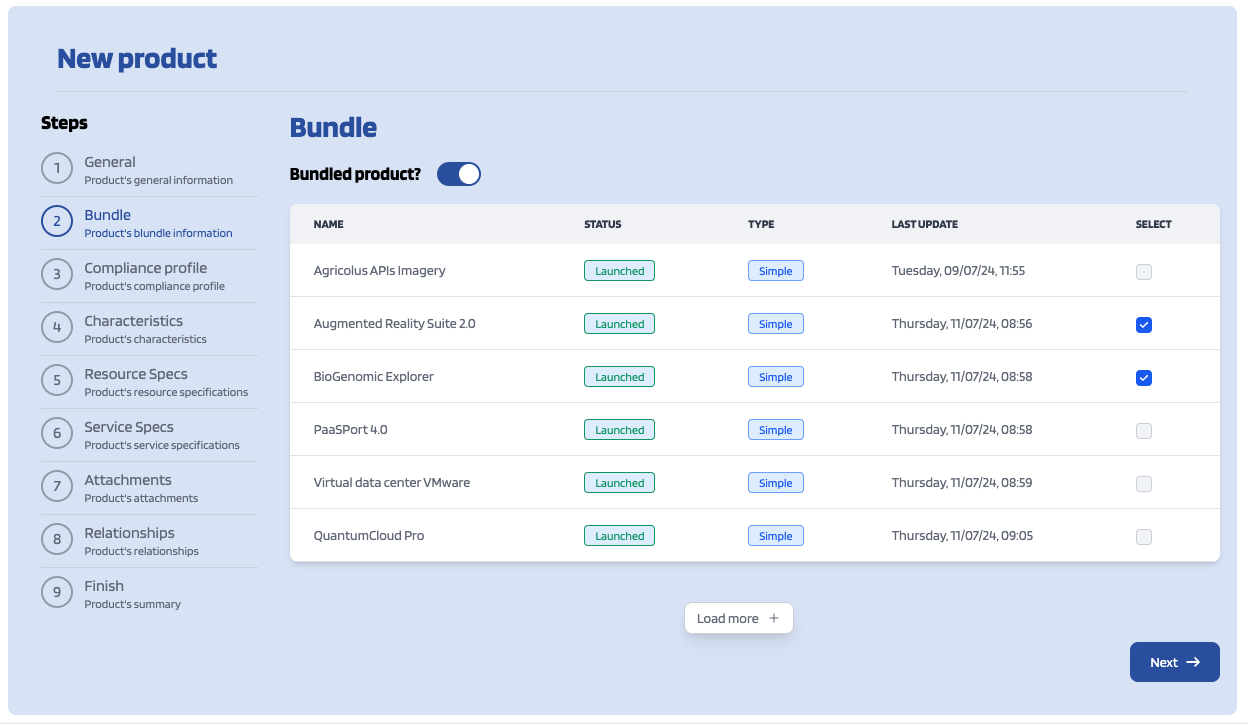
If you have decided to create a bundle, you will be required to choose 2 or more product specs to be included in the bundle. You can select the products that you want to add to the bundle by clicking the check button next to them.
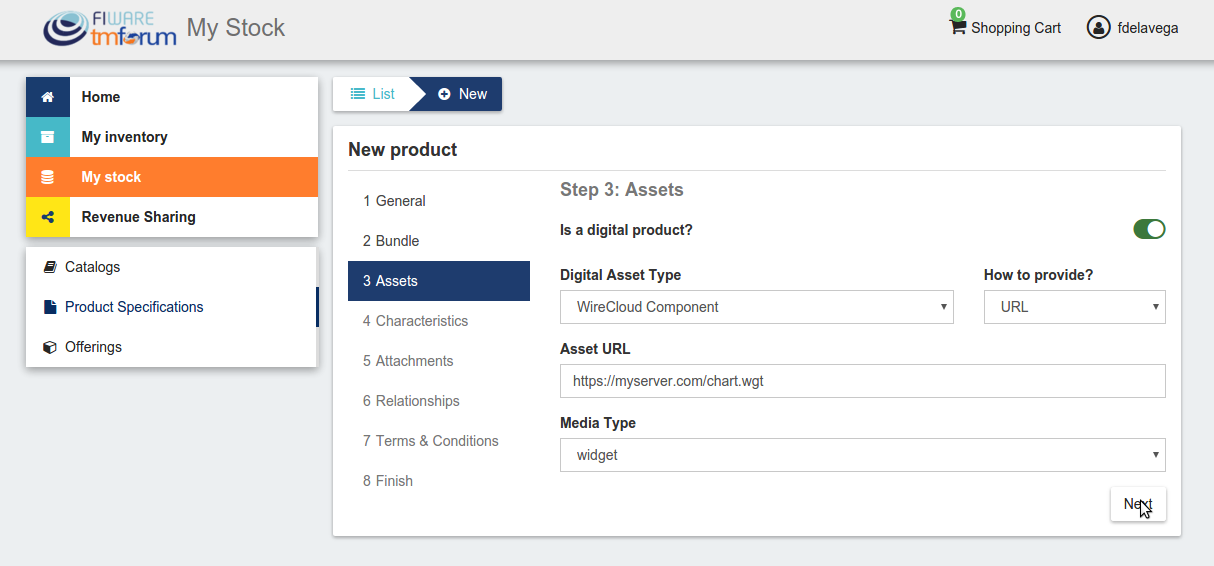
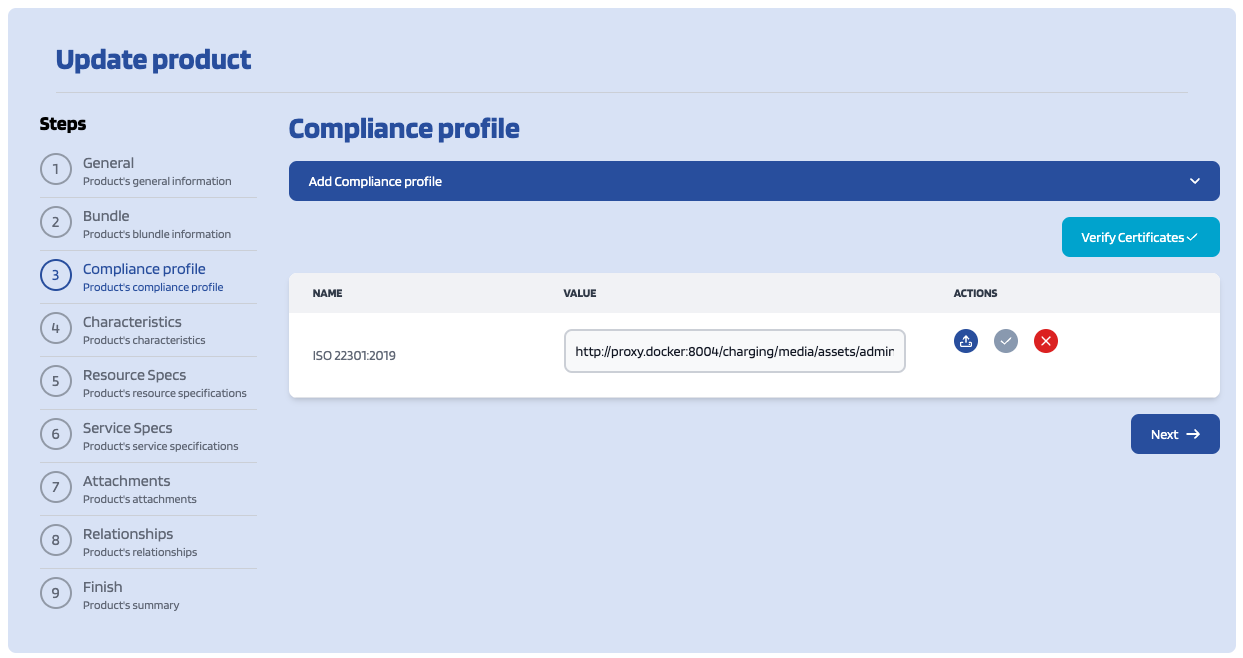
In theThe next step youin canthe choosecreation ifof youra product is aincluding digitalits product.compliance If this is the case, you will be required to provide the asset.profile.
Note
If you are creating a product bundle, you will not be allowed to provide a digital asset since the offered ones will be the included in the bundled products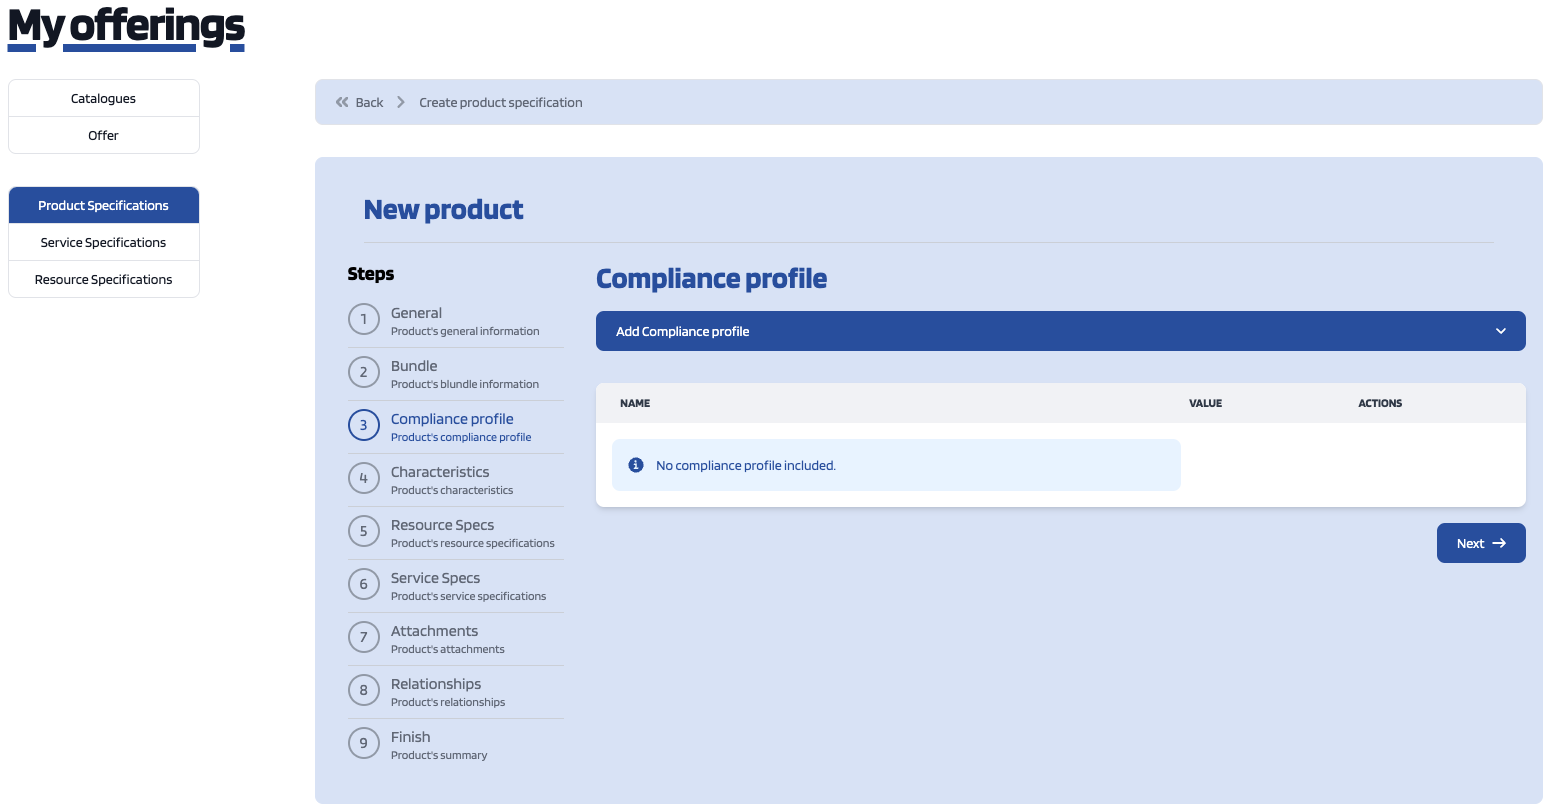
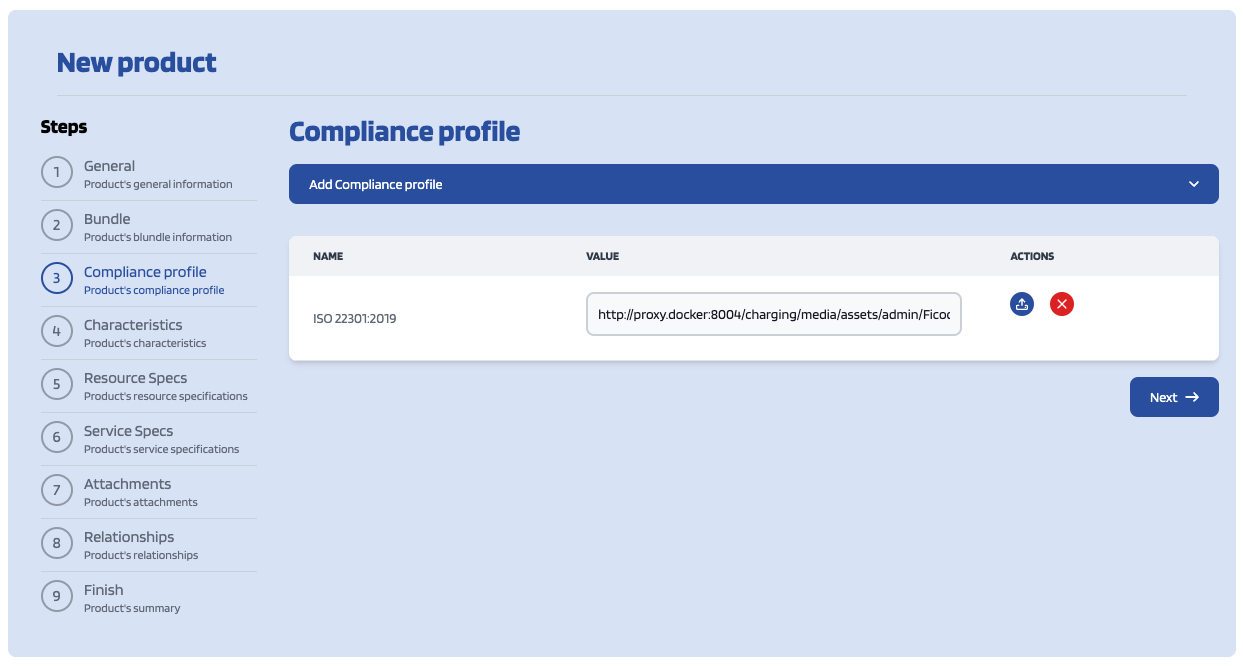
For providingincluding a certification to the asset,compliance profile you haveshould click the Add Compliance Profile button and then the Plus button next to choosethe betweencertification that you want to add.

Once you've selected the availablecertification assetyou types,should choosefill howits value field by adding a link to providethe certification archive or, alternatively, you can click the assetUpload betweenbutton and upload the availablecertification options,archive providefrom theyour asset, and include its media type.computer.


Whenever you've finished adding certifications you should click on Next button.
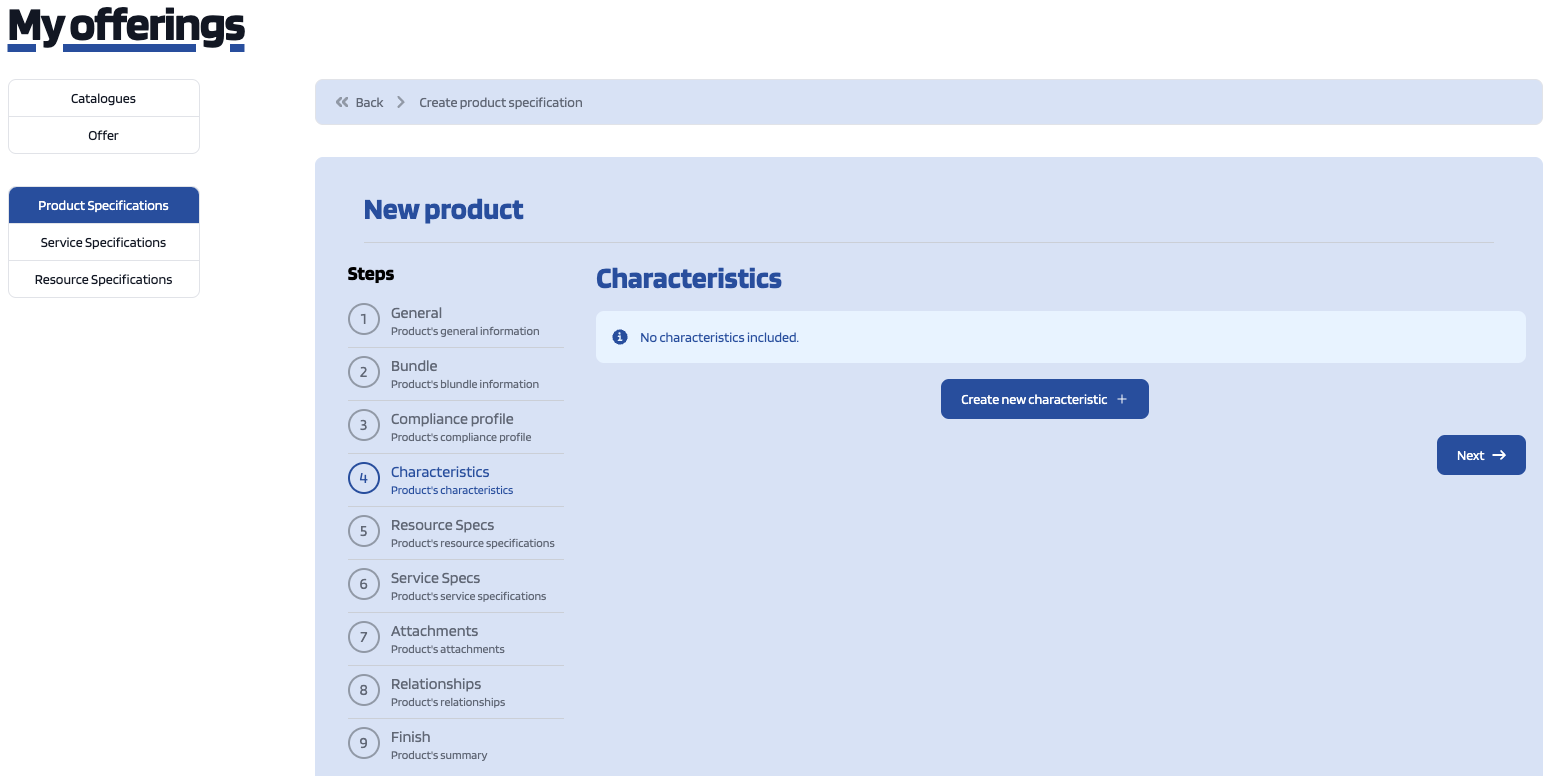
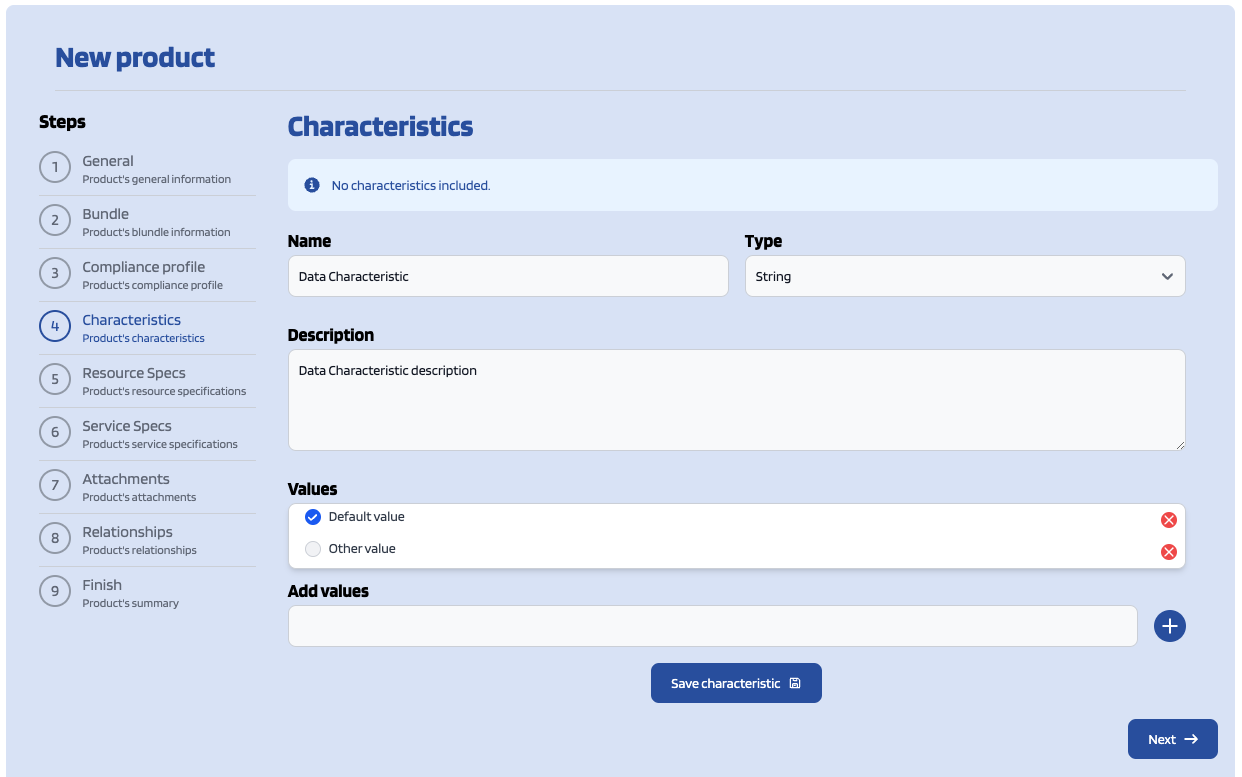
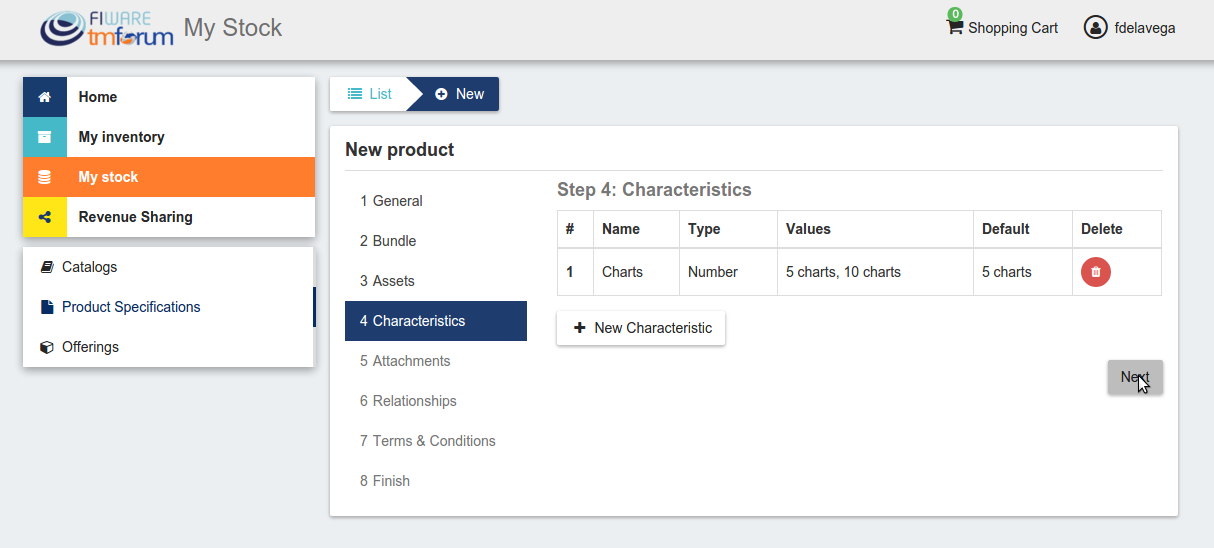
The next step in the creation of a product is including its characteristics. For including a new characteristic click on NewCreate Characteristicnew characteristic and a creation form will be displayed.
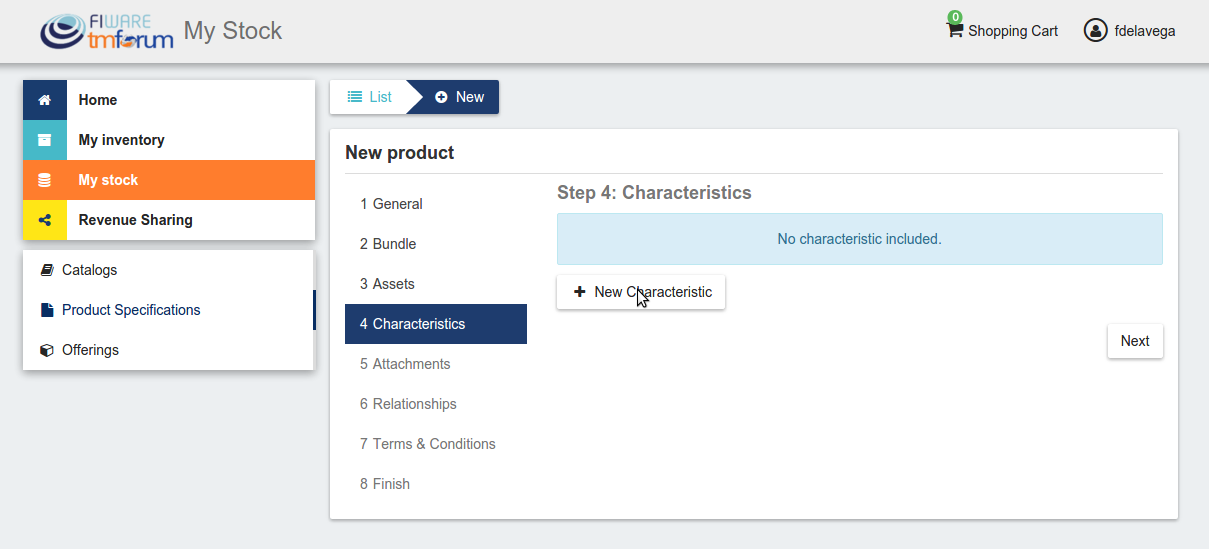
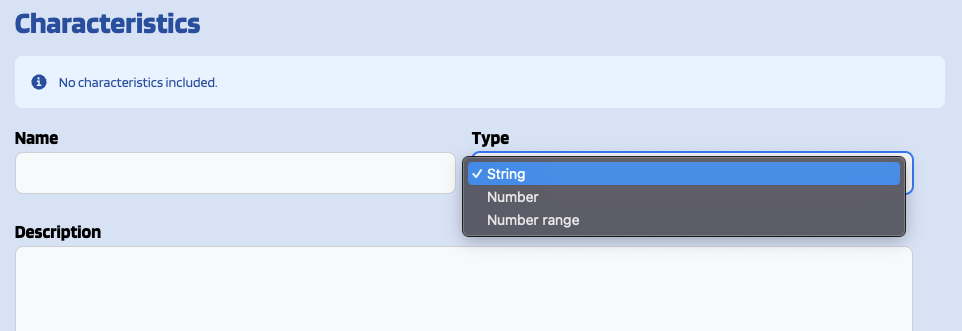
In this form you can select the type of characteristic that you want to create (i.e. String, Number or Number Range) by clicking on the type dropdown button.
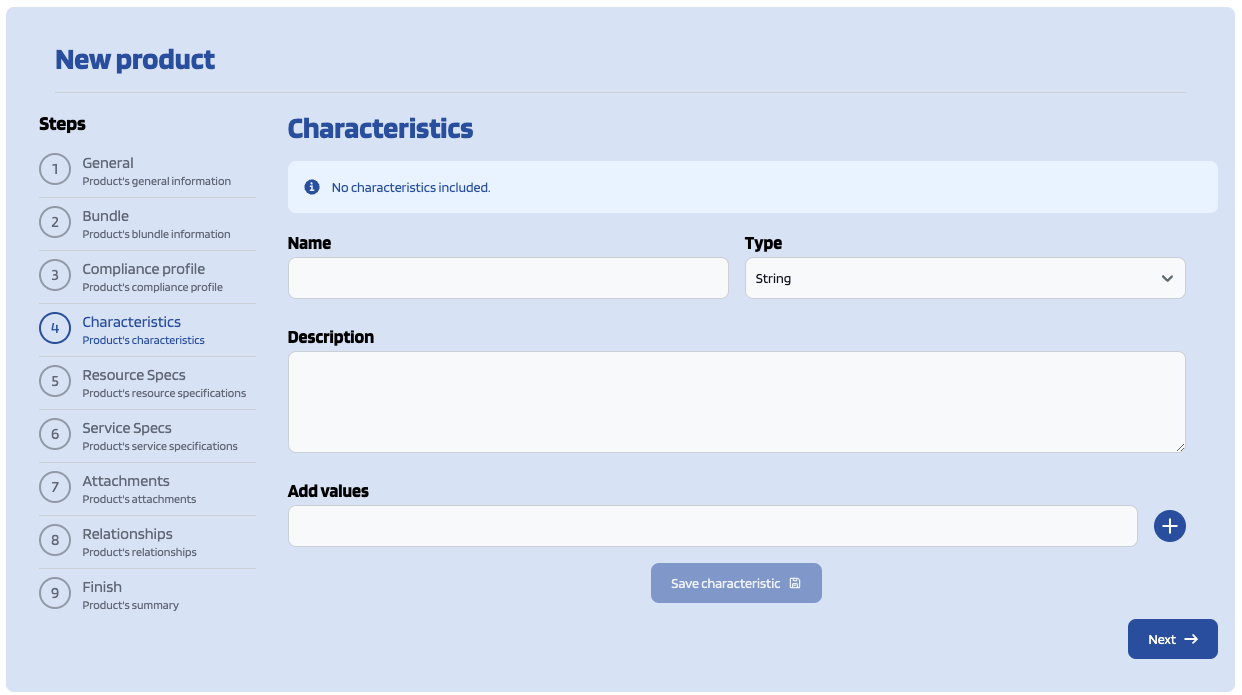
Once you've selected the type of characteristic that you want to create you should fill the name and description fields and add at least one value by filling its fields and clicking on the Plus button next to them.
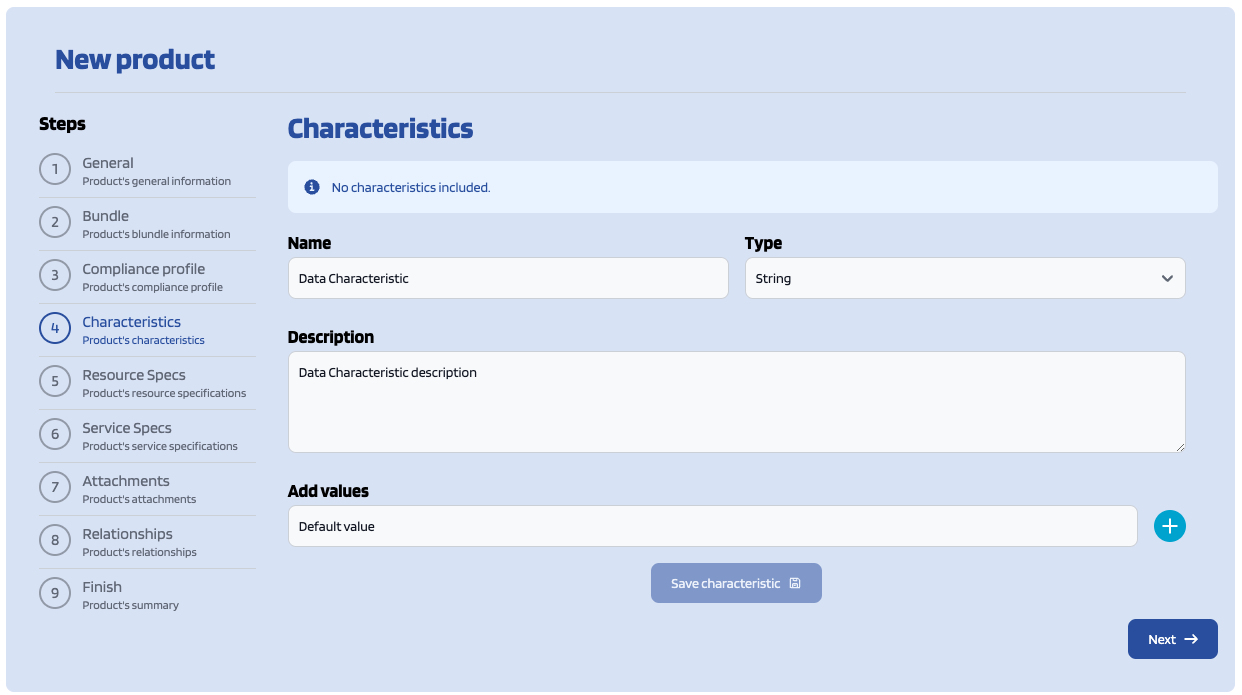
Additionally you can delete any value you've created by clicking on the Delete button next to the value itself and select the default value for the characteristic by clicking on the check button of the specific value (the one with the blue check next to it is the default value).
Whenever you finish filling the characteristic's information you should click the Save characteristic button.
On the characteristic's list preview you can also remove any characteristic by clicking the Delete button next to it.
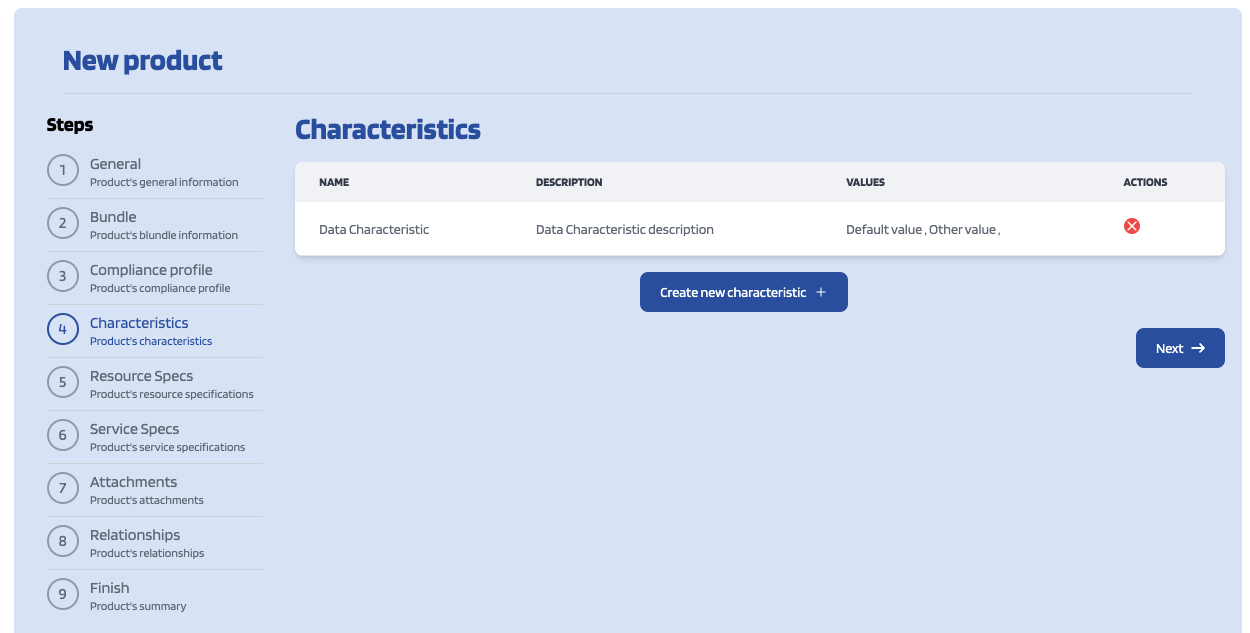
If you're done with the characteristics you can click the Next button.
In the form,next includestep you can add as many resources as you want to the name, the type (string or number) and an optional description. Then create the values of the characteristicproduct by filling the Create a value input and clicking on the check button next to them and then click +Next.
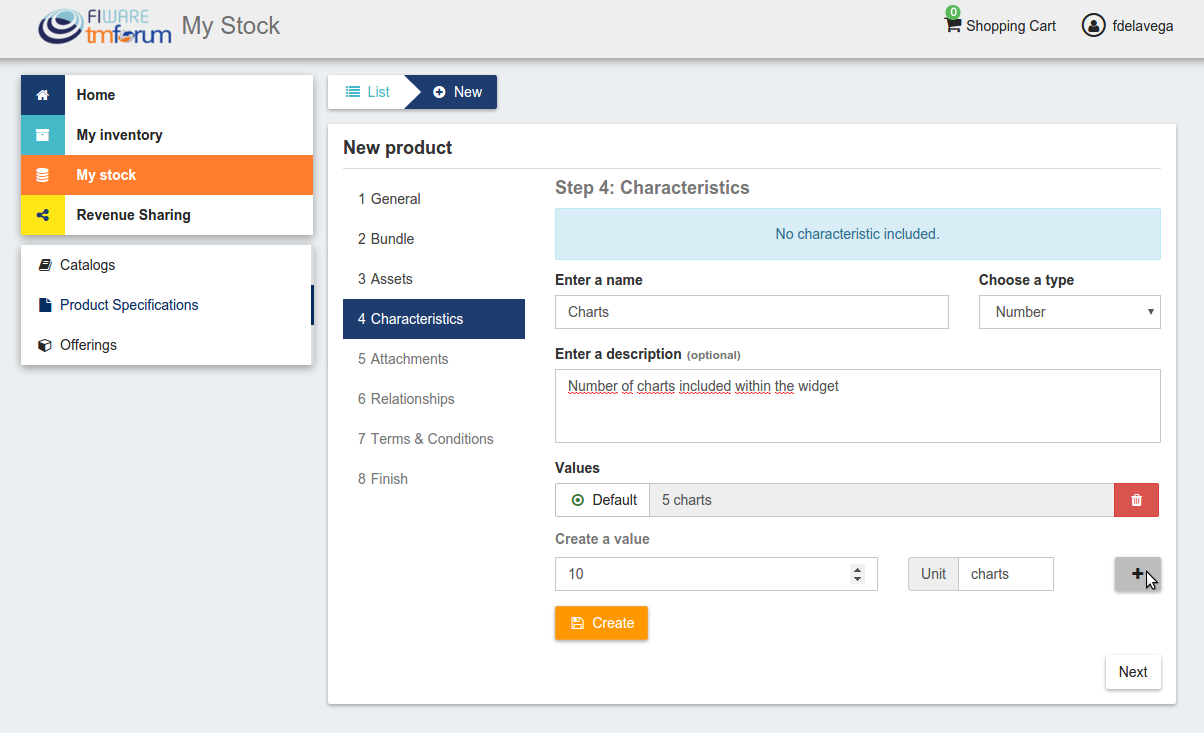

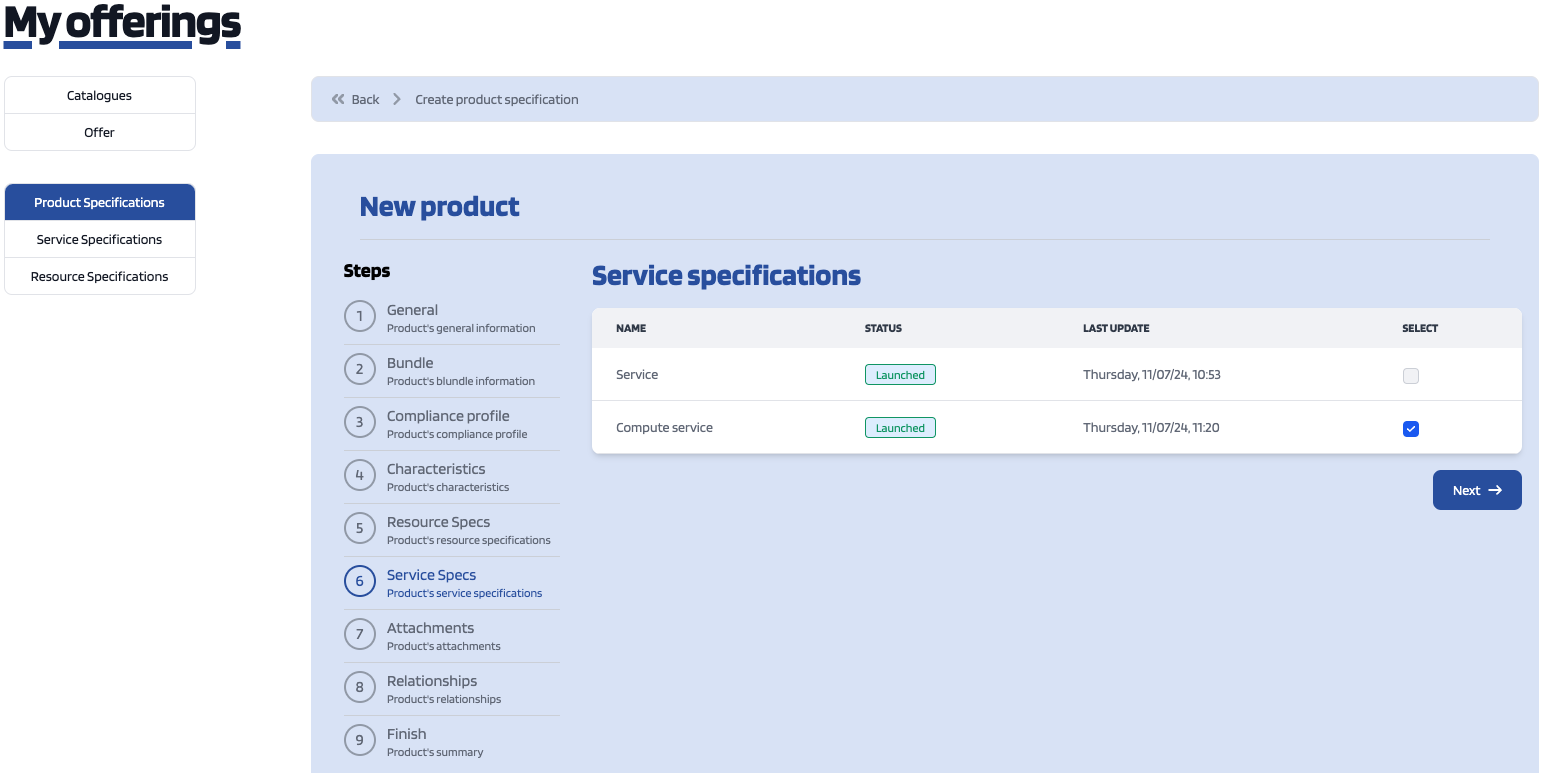
OnceThe same way as in the previous step, in this step you havecan includedadd allservices to the characteristic info, save it clicking on Createproduct.

Once you have included all the required characteristics click on Next
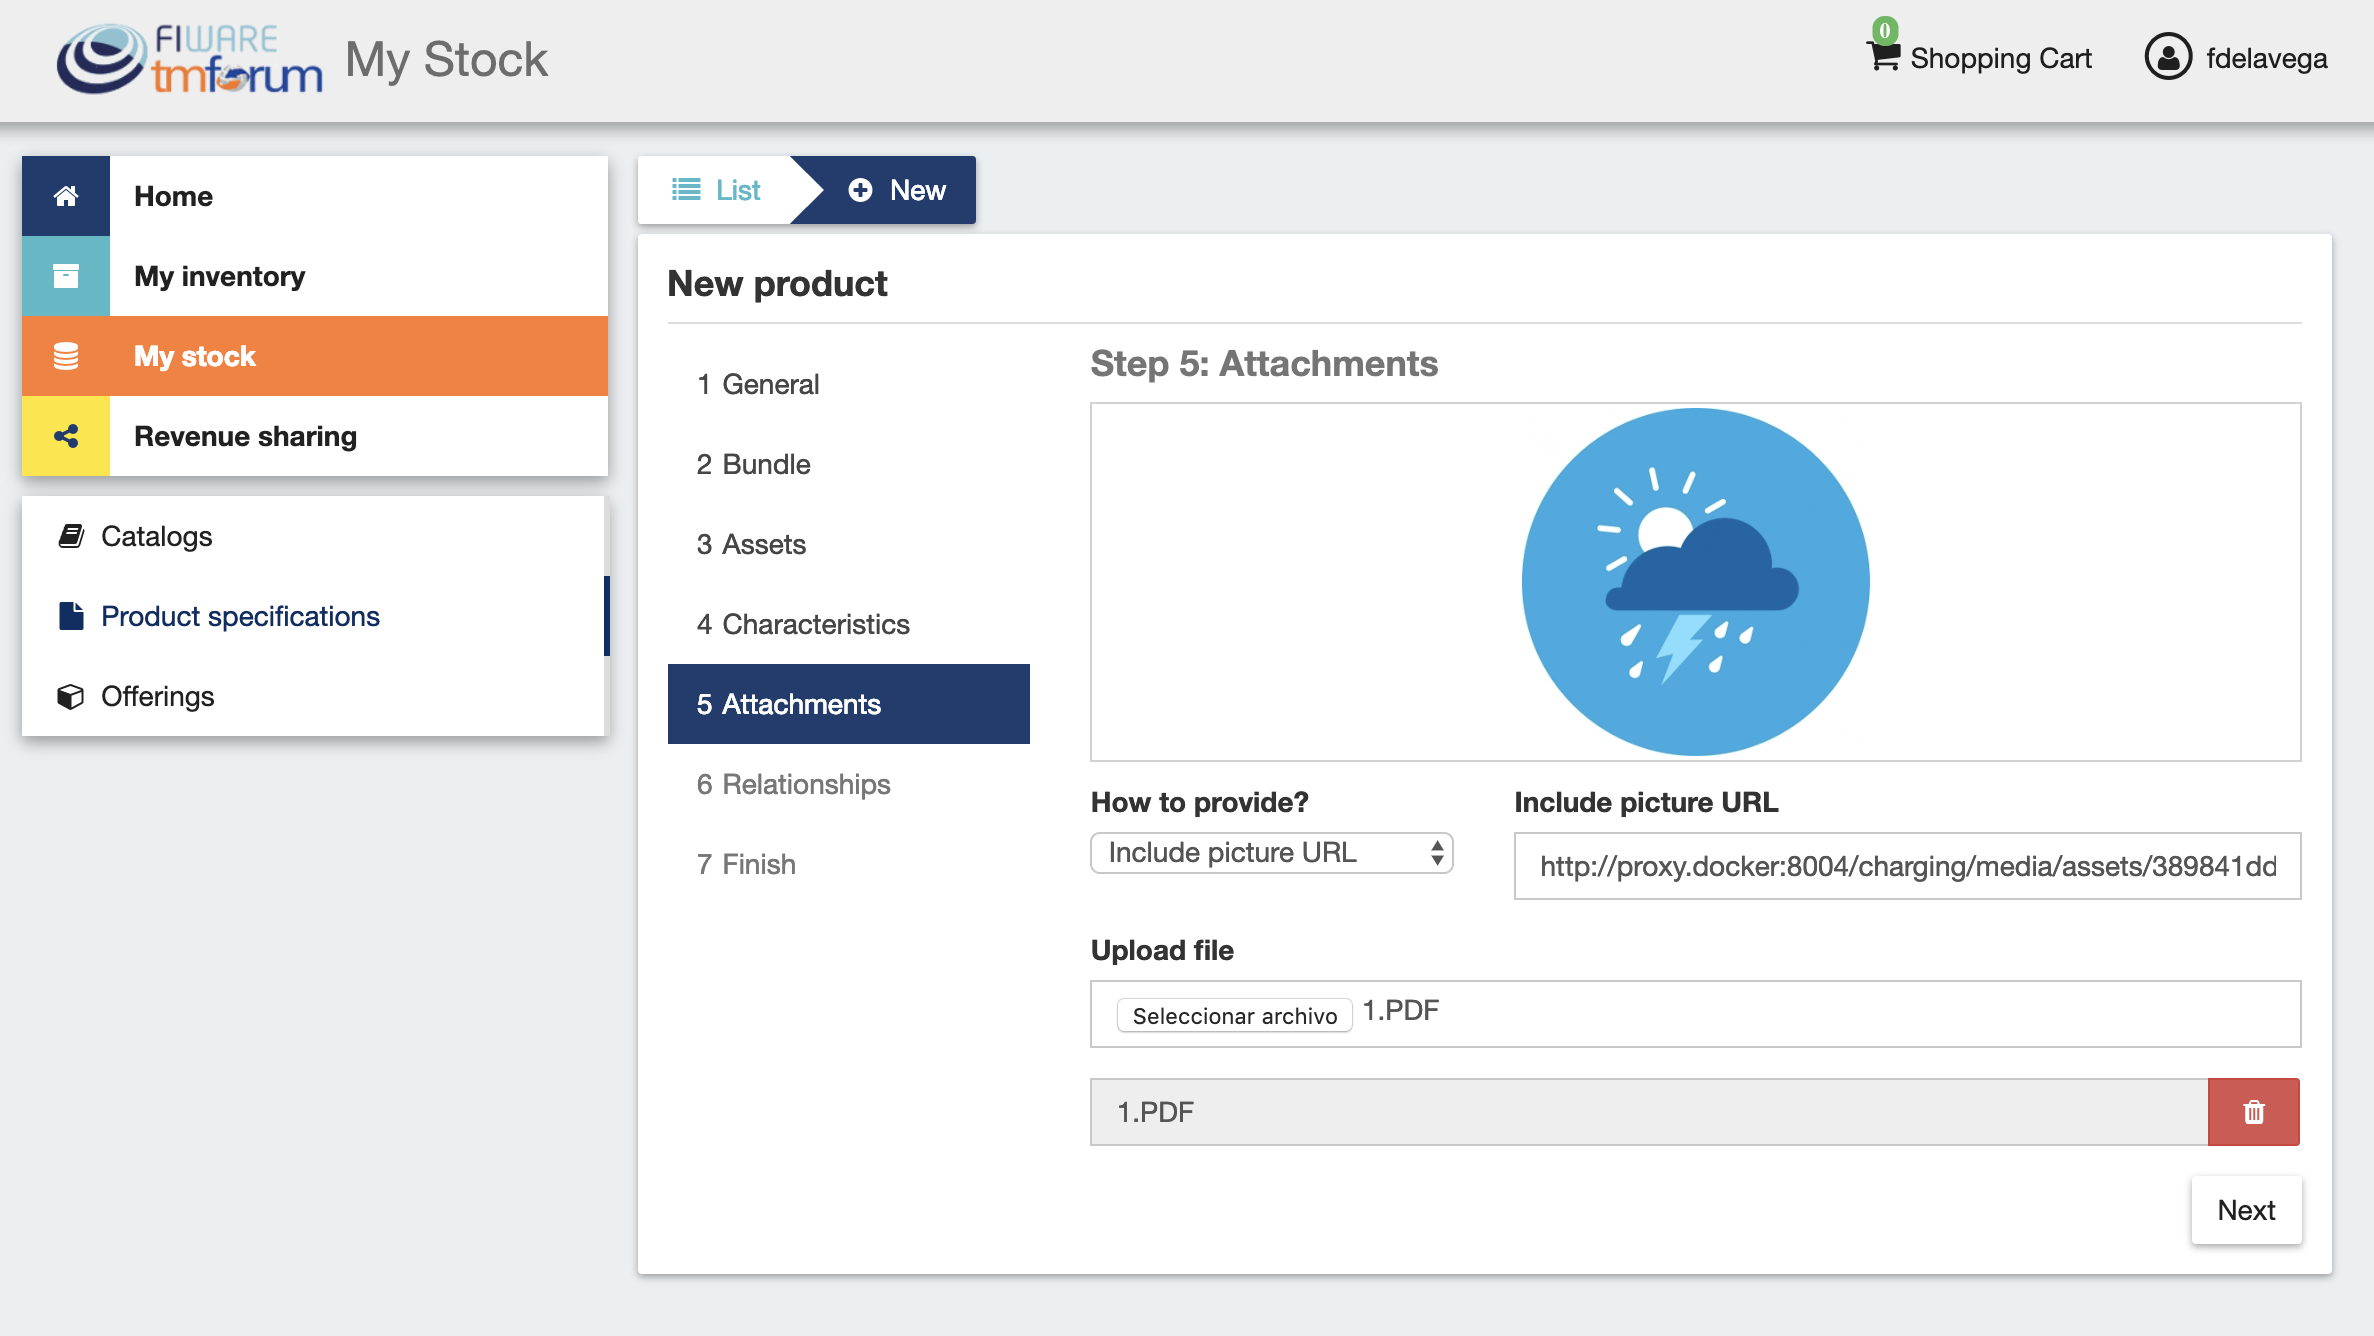
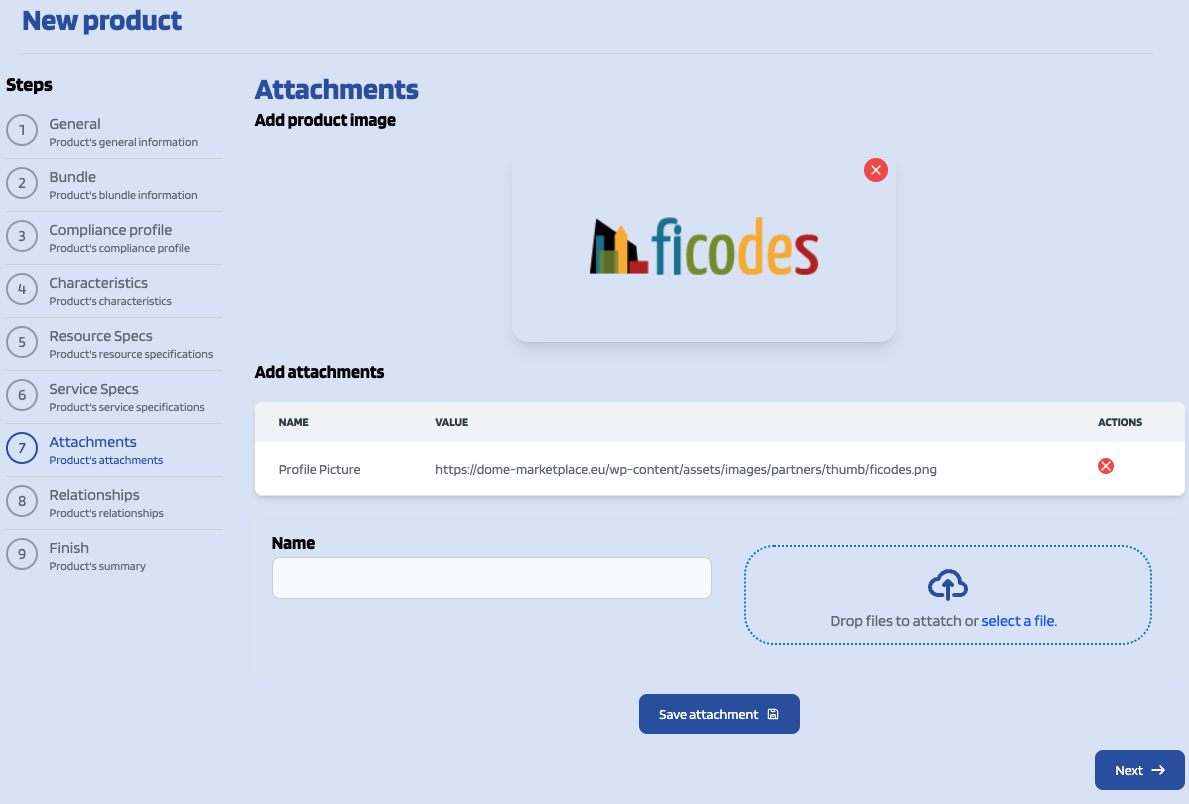
In the next step you can include a picture for your product spec.and Youadd as many files (such as images, PDF documentation, etc.) as you want to the product as attachments.
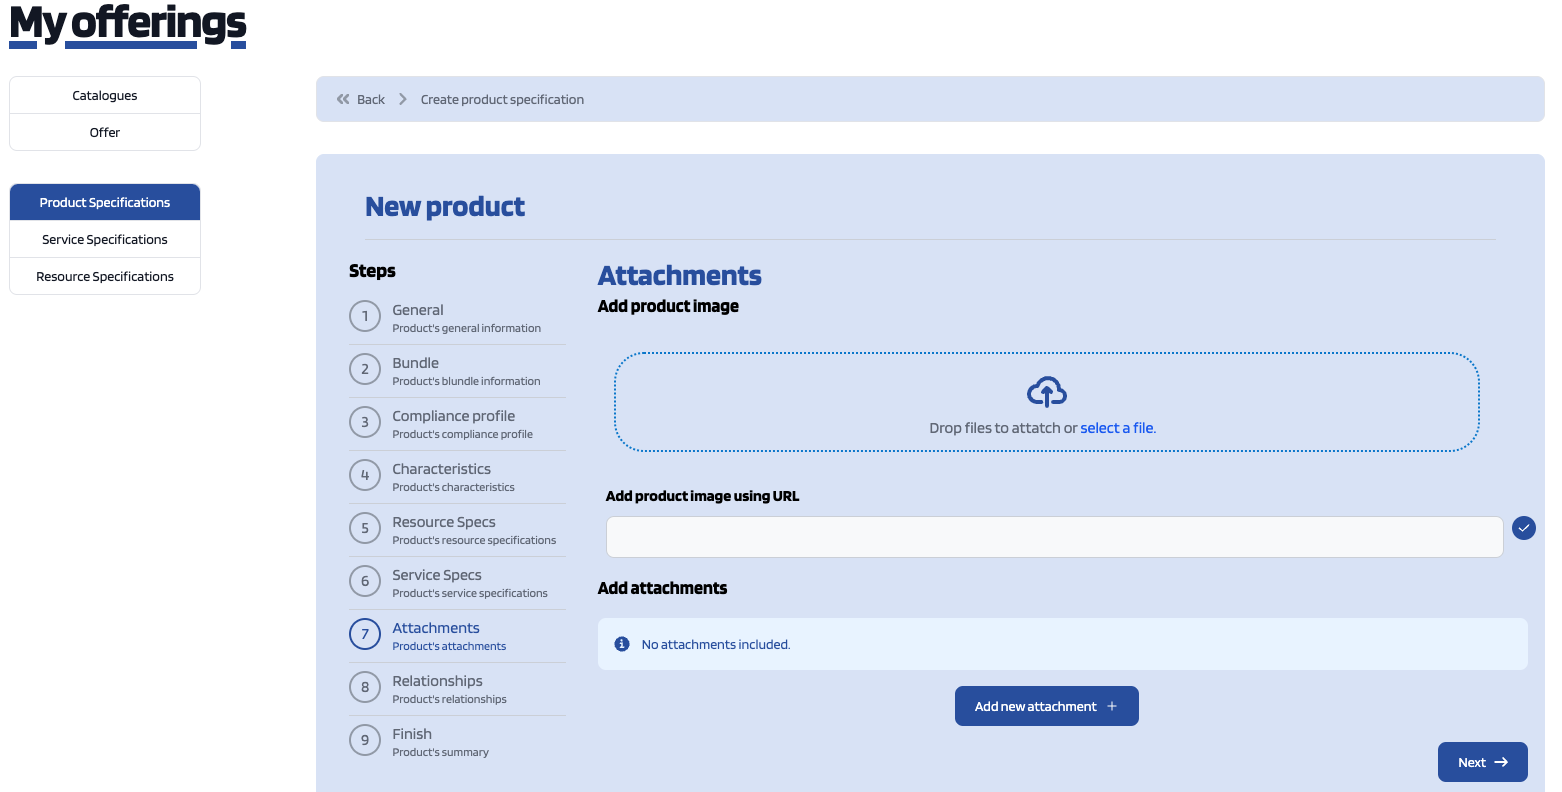
If you want to add a picture for your product you have two options, providing an URL pointing to the picture or directly uploading it.
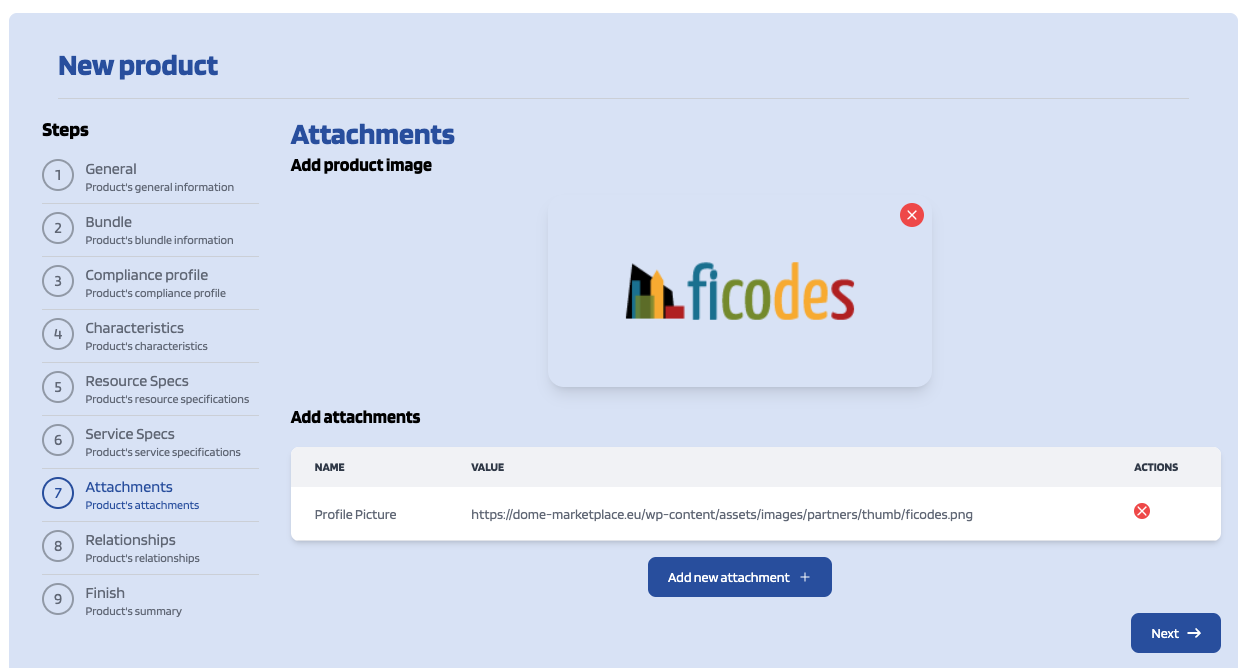
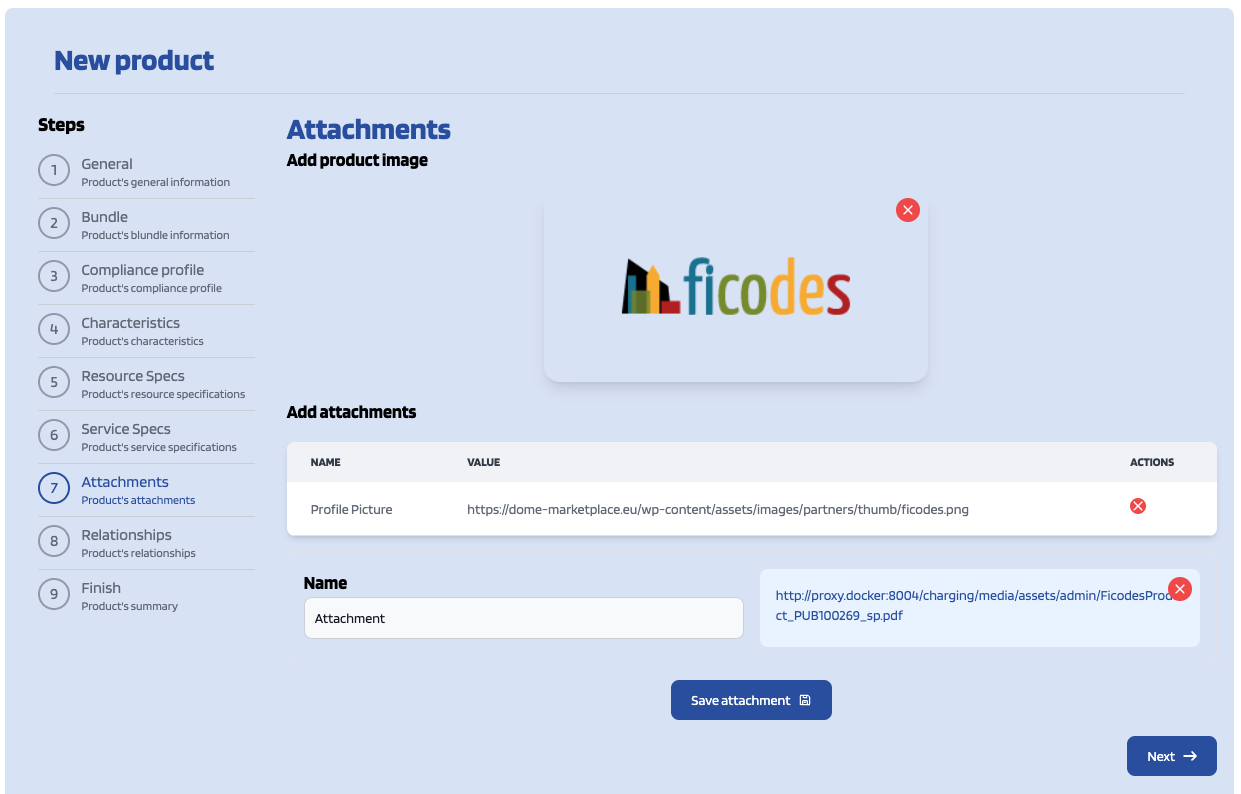
If you want to add other files you can do it isby possibleclicking to include multiple file attachments toon the productAdd spec,new suchattachment asbutton. images,Here PDFyou documentation,should etc.fill the attachment's name and upload the file. Once provided click NextSave attachment.

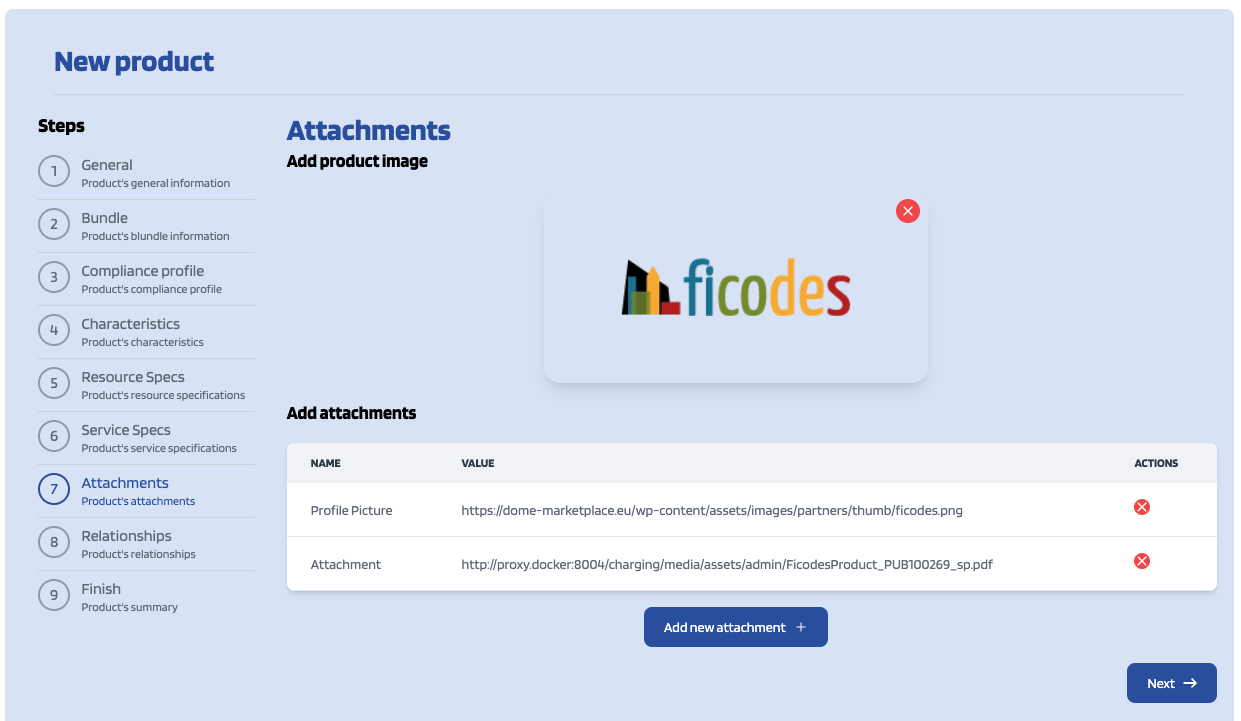
Additionally you can remove added attachments by clicking the Delete button next to it.
Whenever you've finished adding attachments click Next.
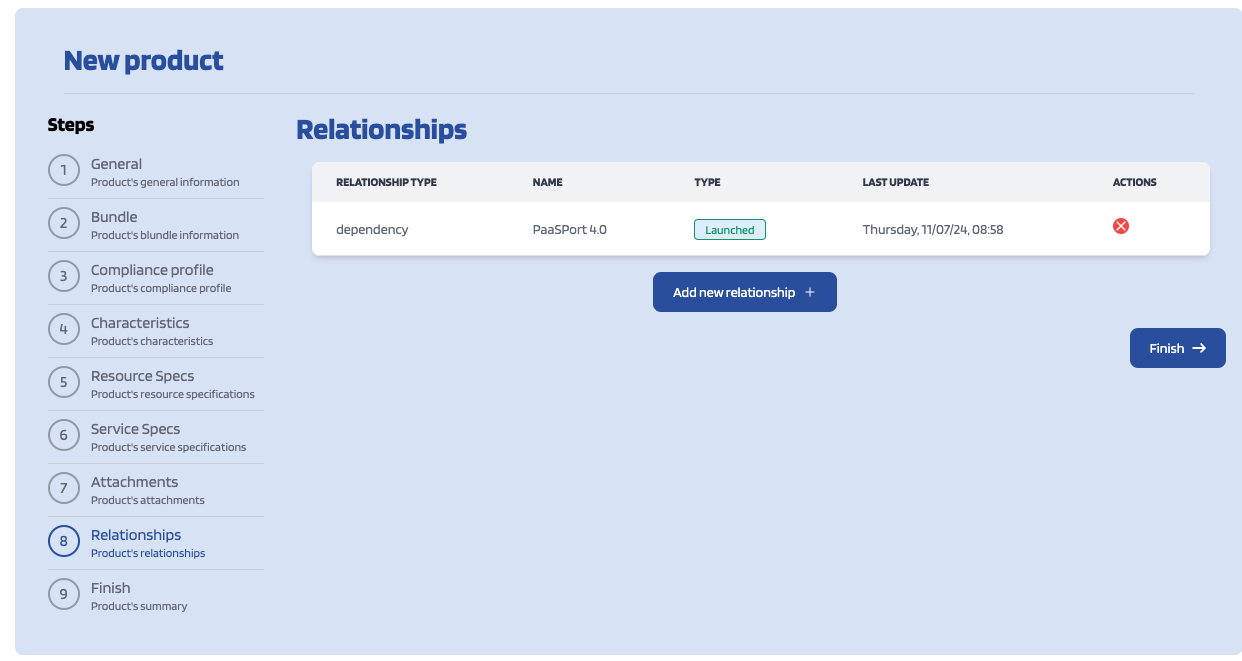
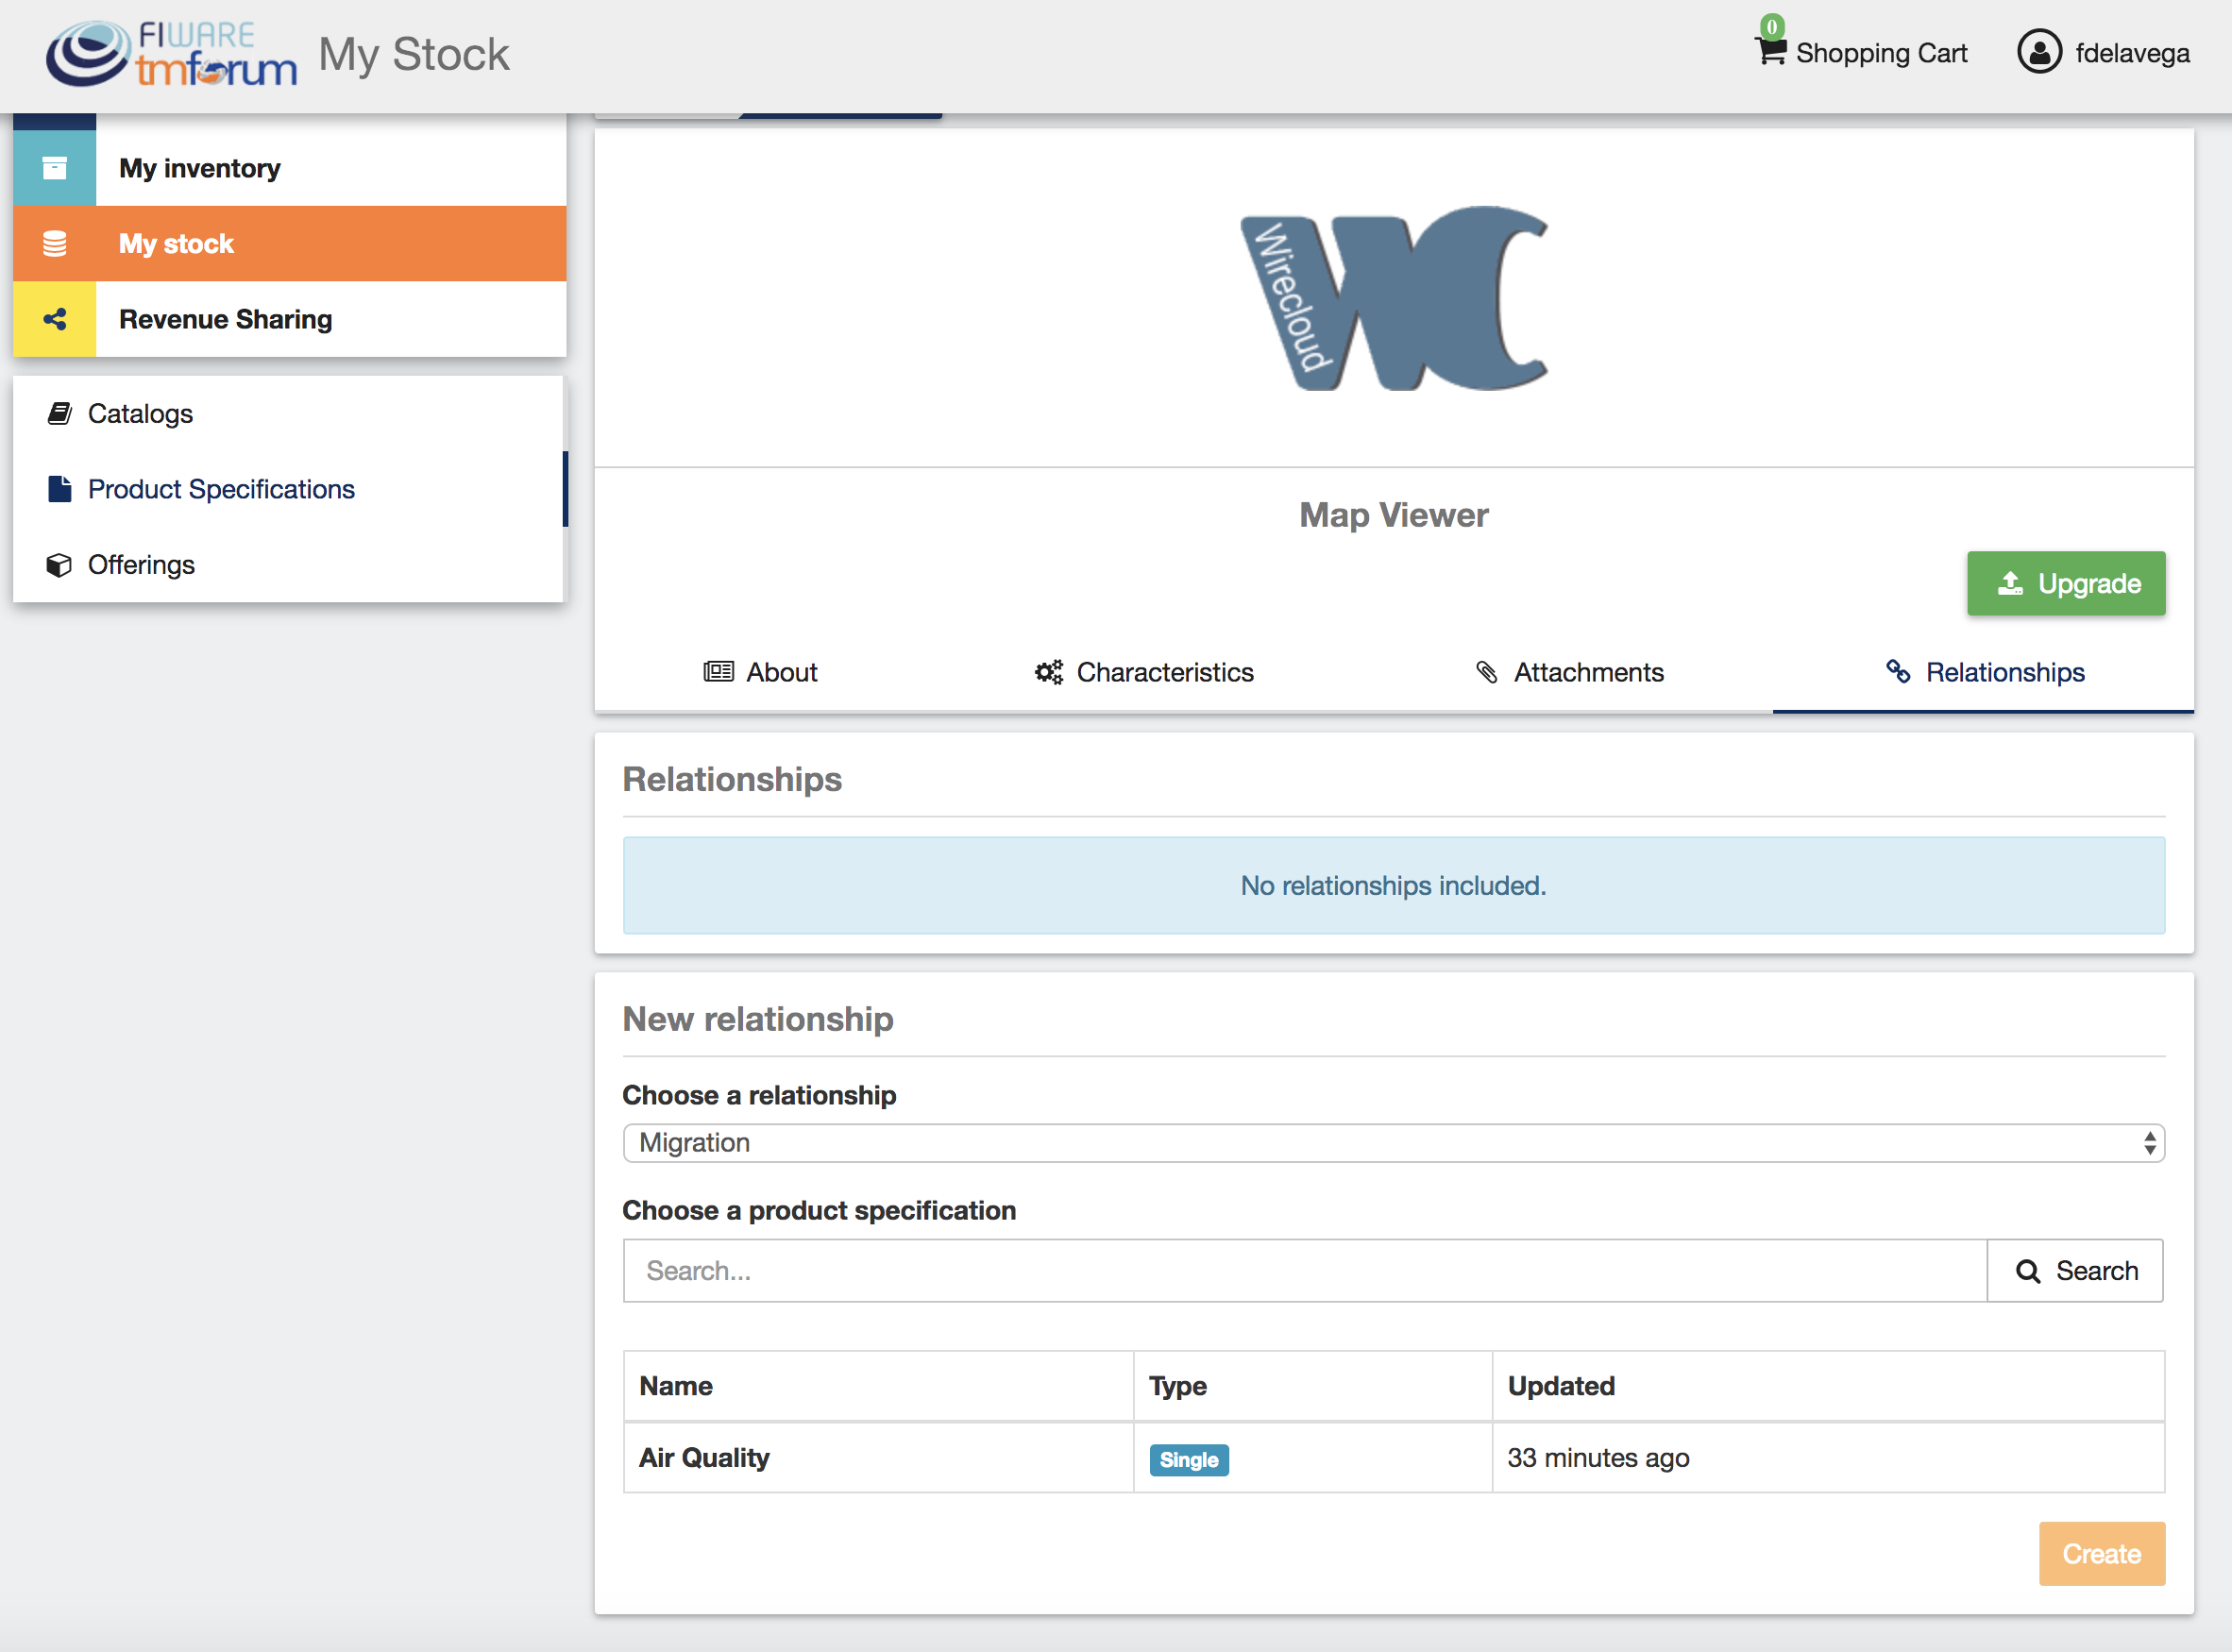
In the lastnext step, you can specify relationships of the product you are creating with other of your product specs.
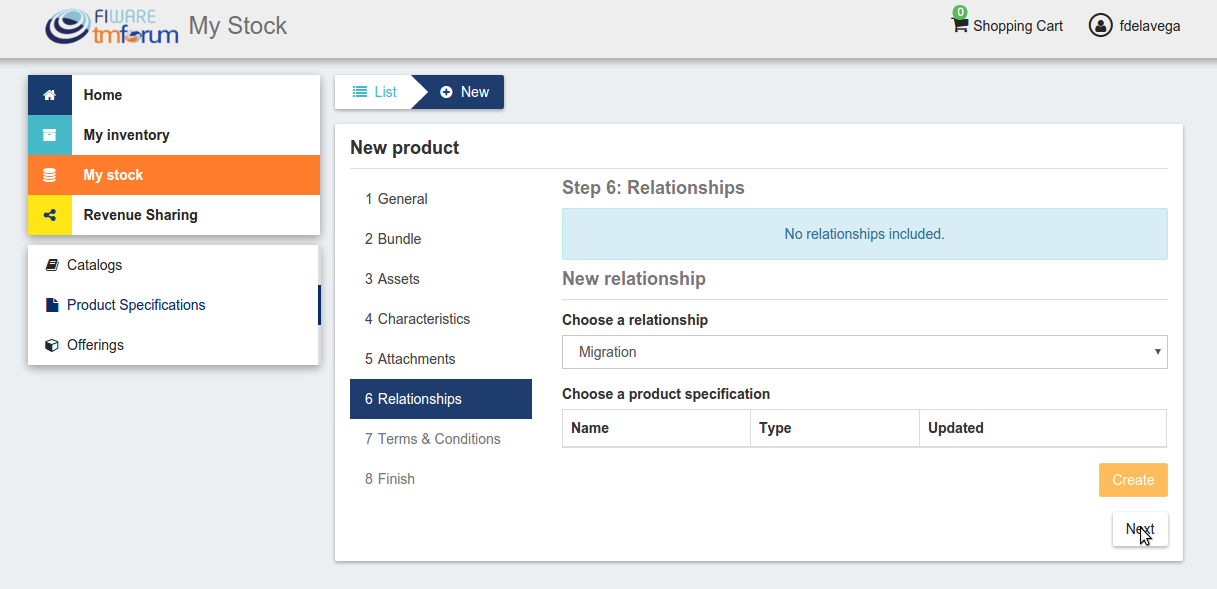
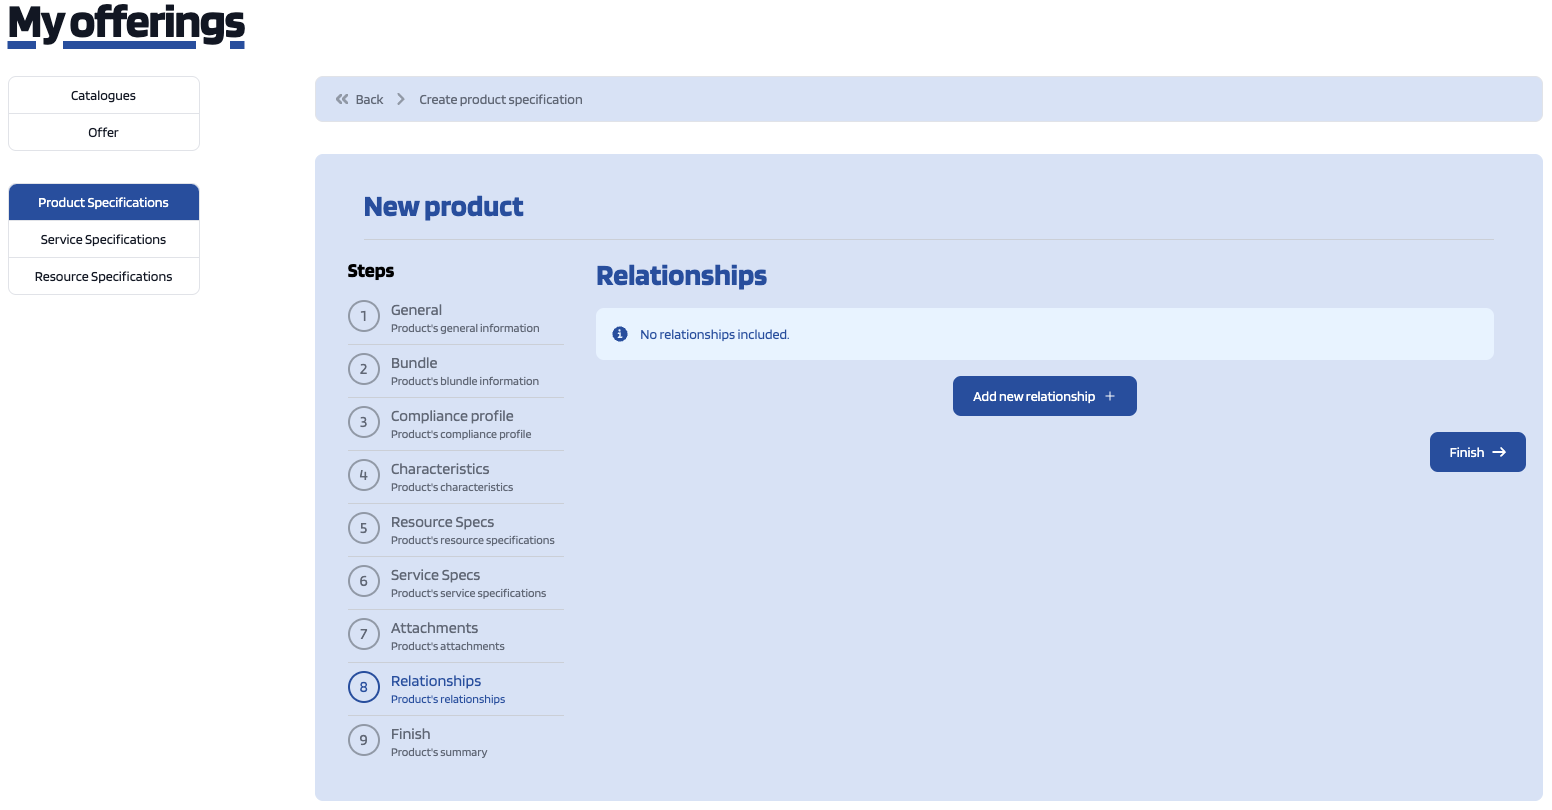
If you want to add any relationship to your product click Add new relationship.
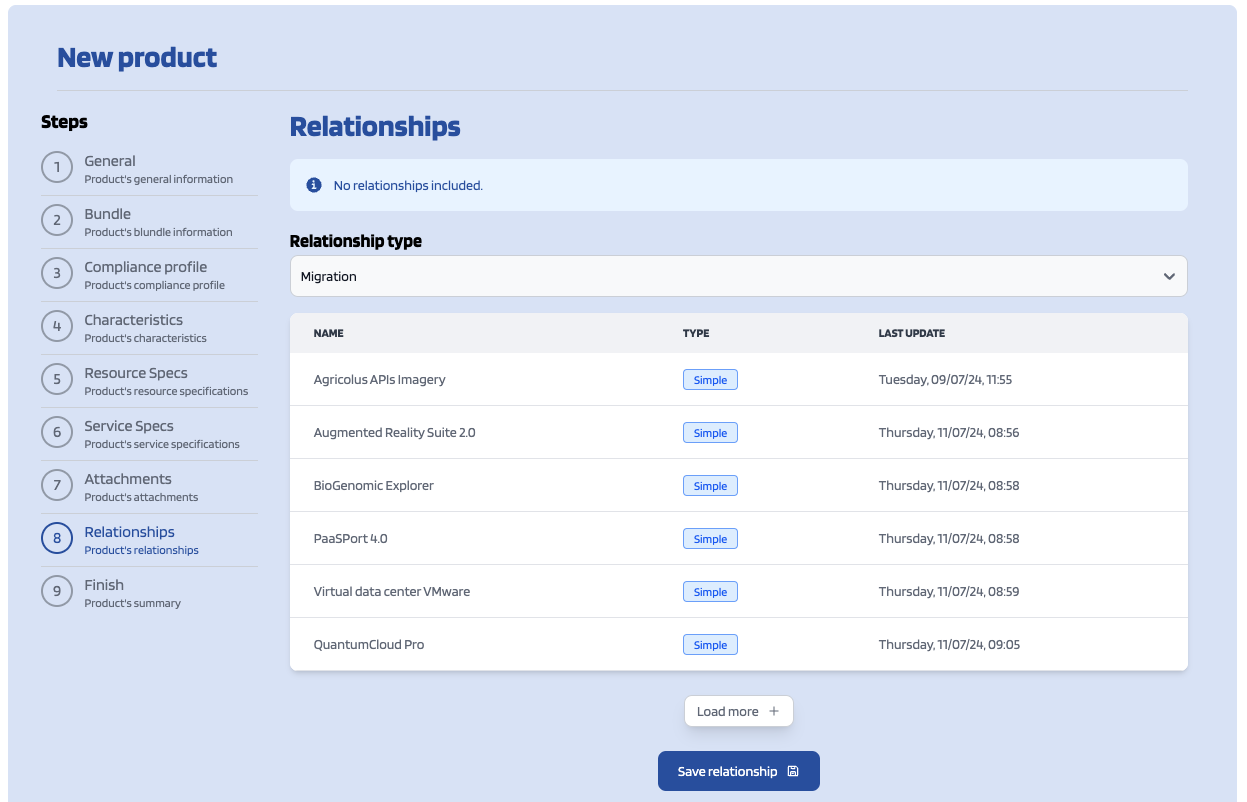
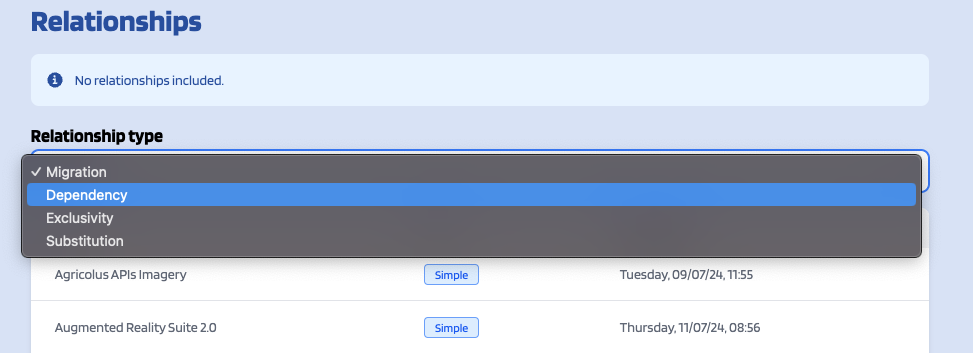
You should select the relationship's type by clicking on the Relationship Type dropdown and the product with the product to created will be related by clicking on its row on the table. Once you're done click onSave Relationship.
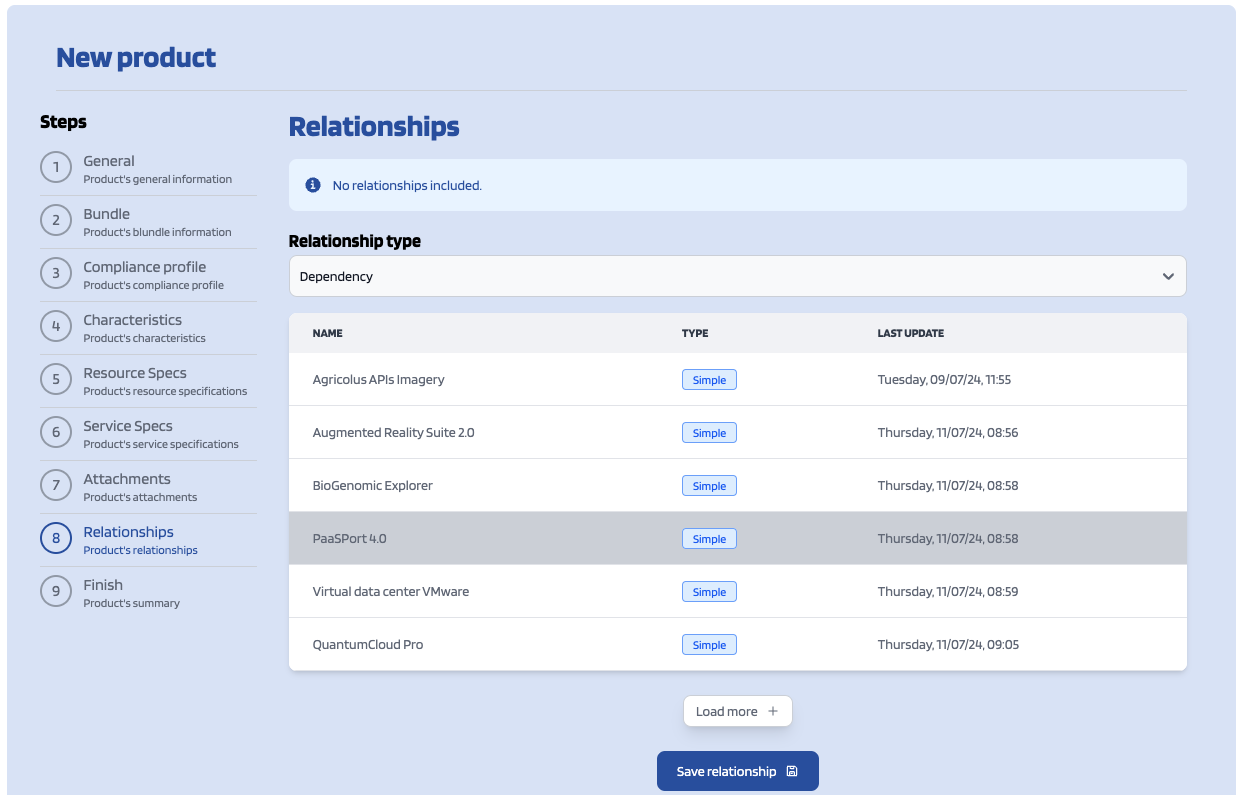
Whenever you've finished adding relationships to the product click NextFinish.
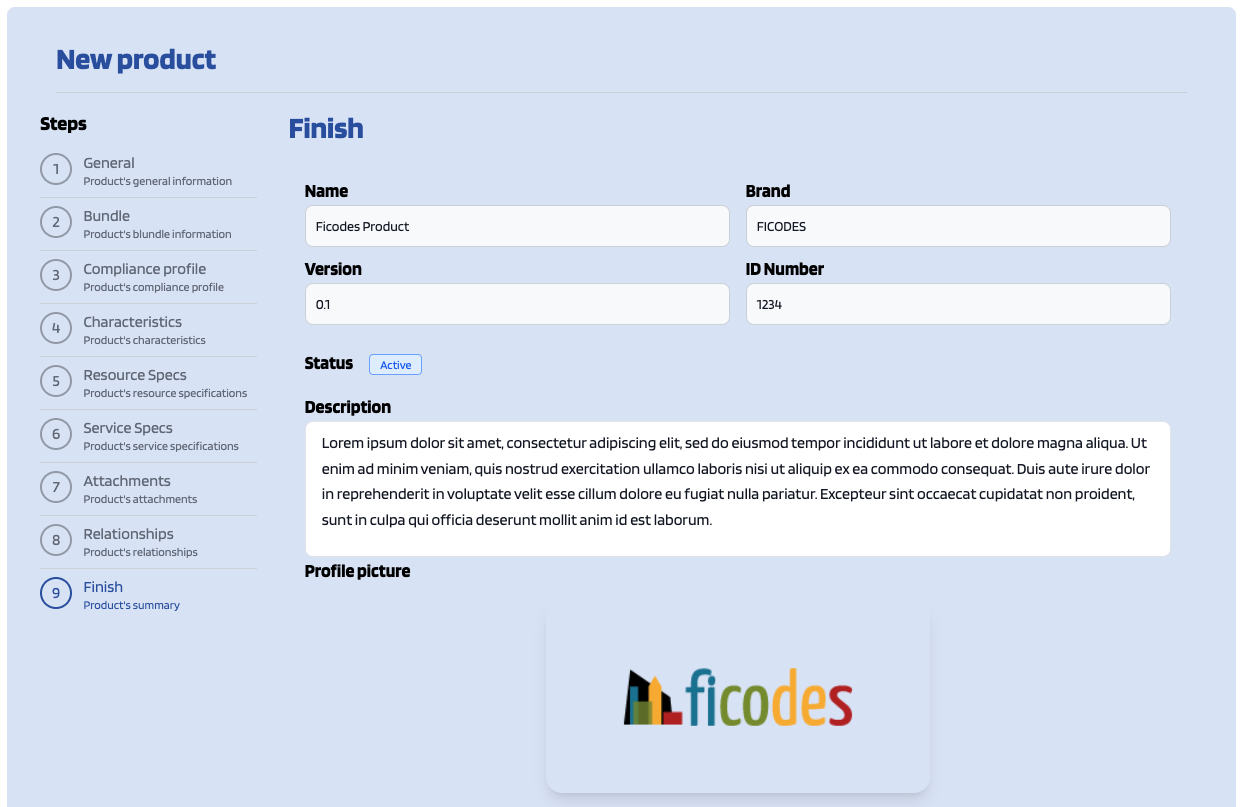
In onthe last step a review of the product to create is shown. If everything is okay click Create product.
Sellers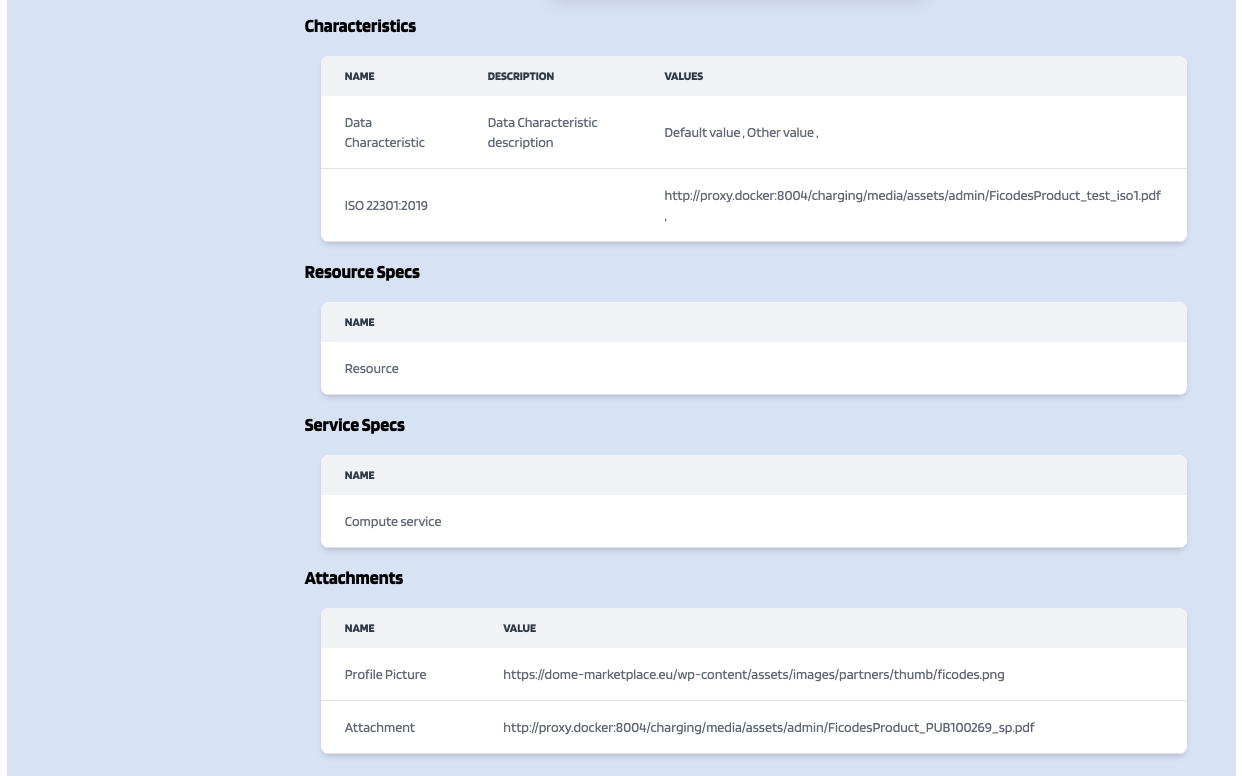

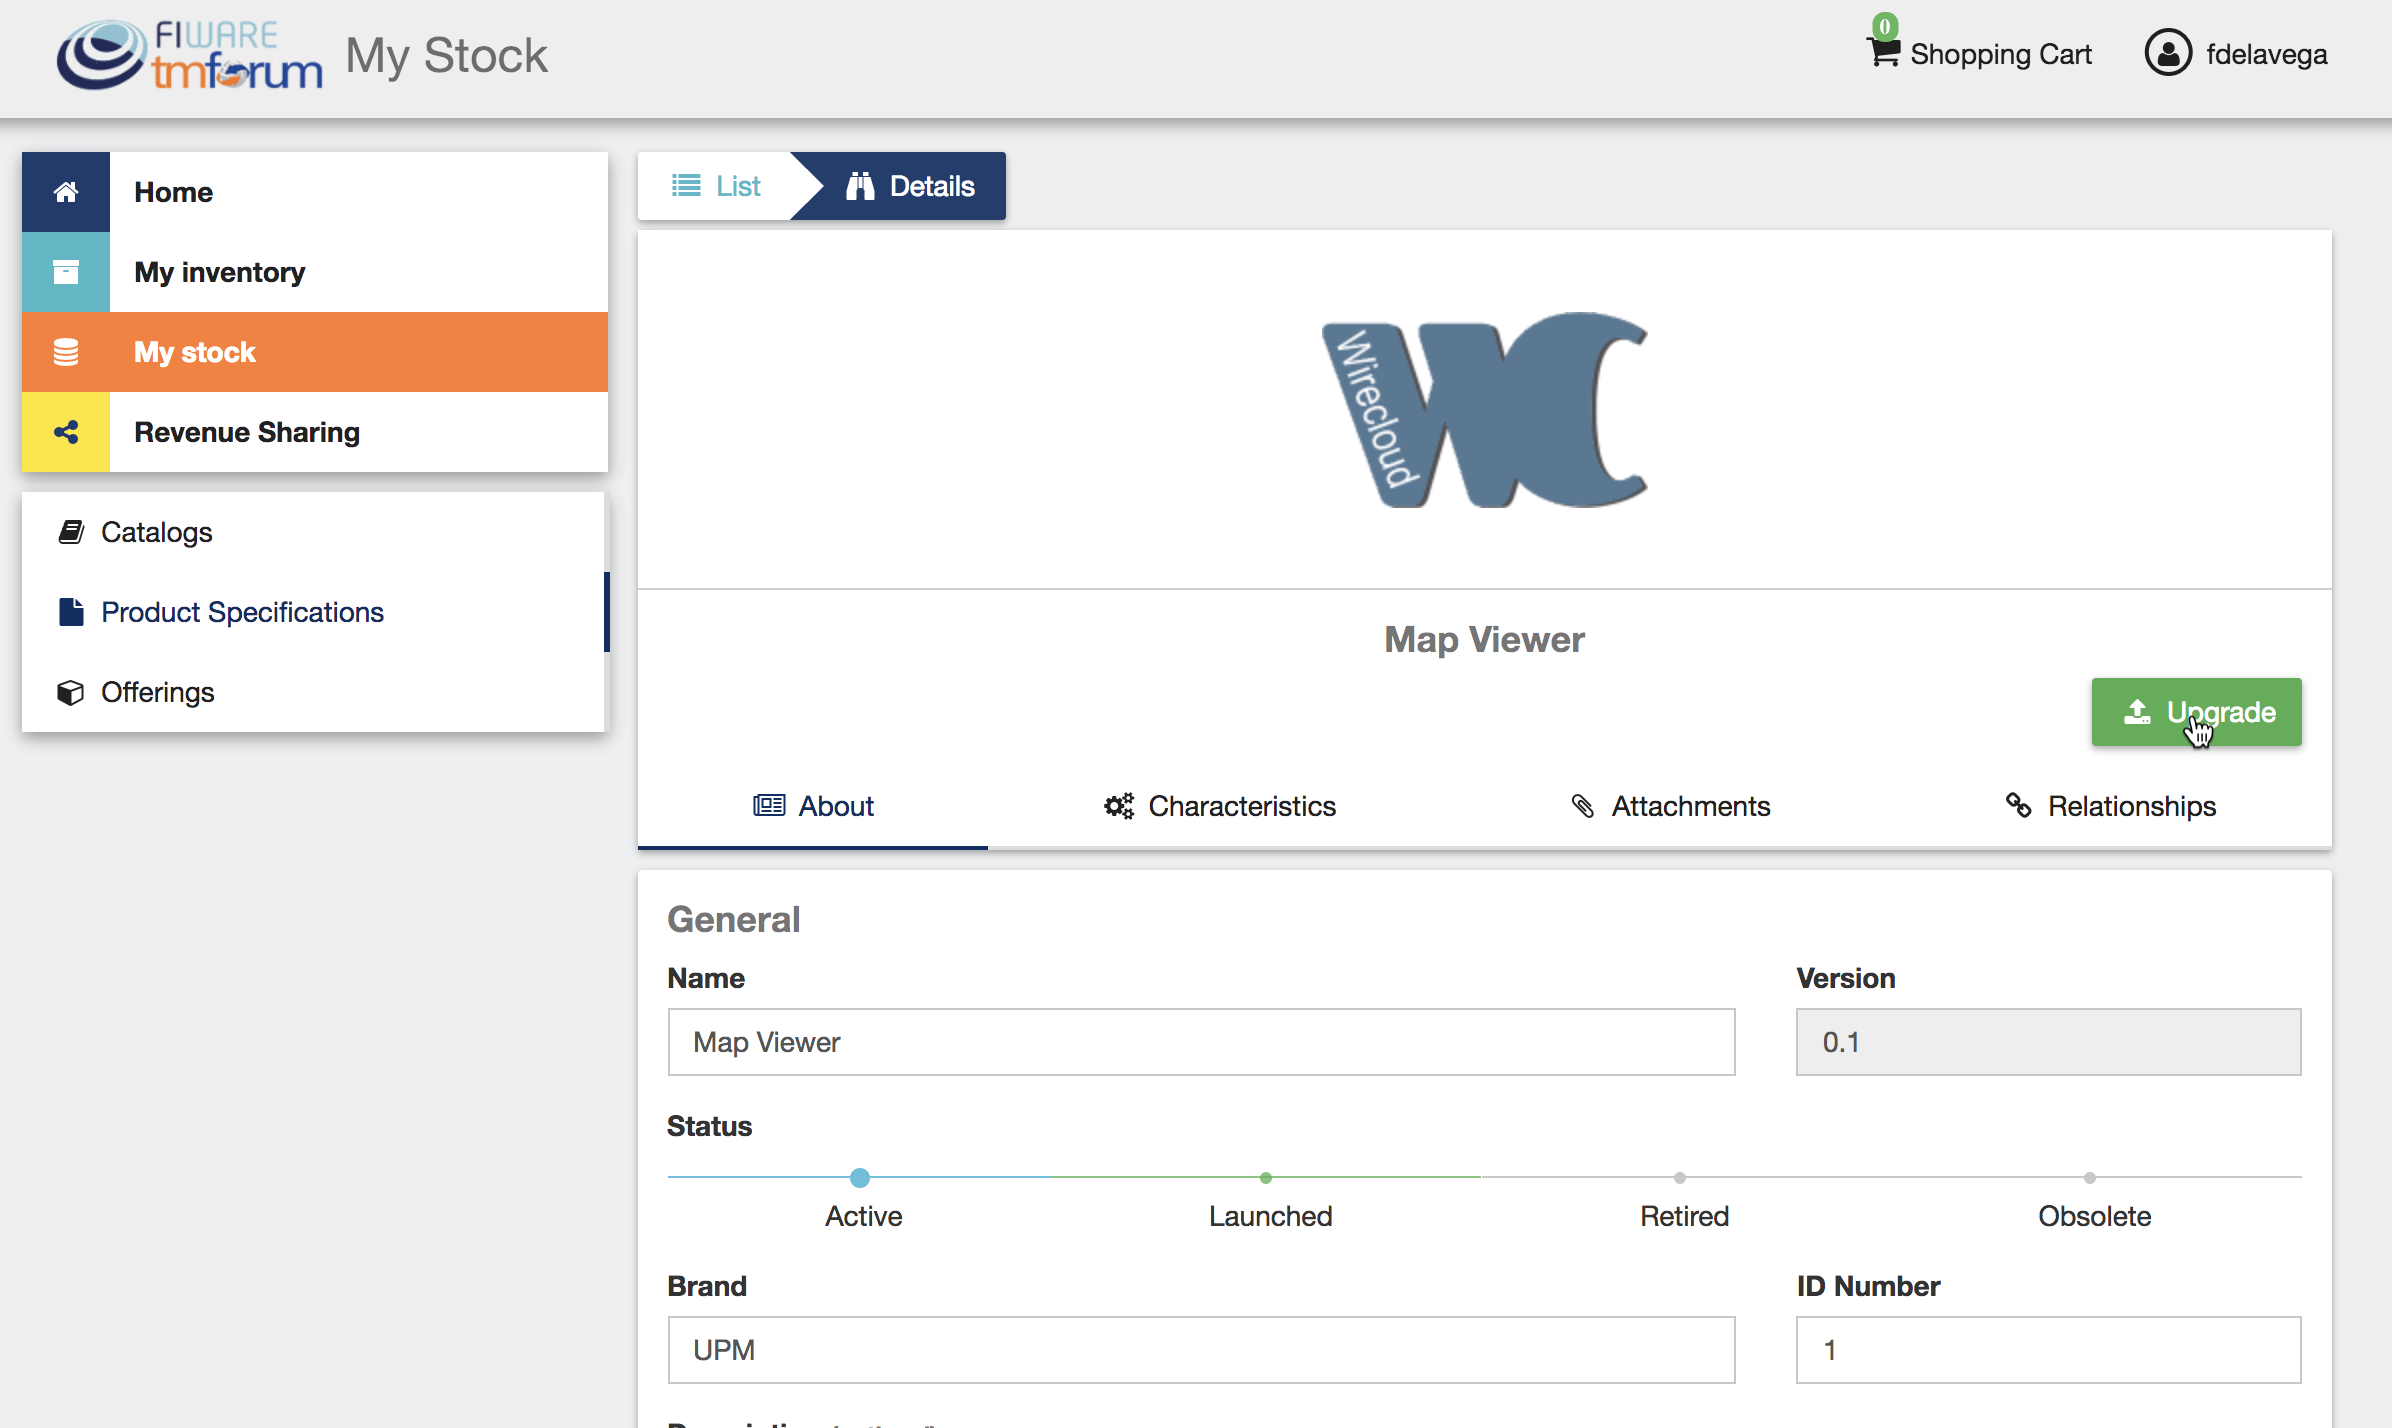
Providers can update their products. To do that click onthe Edit button next to the product specification to be updated.

Update the required valuesvalues, click over Next buttons (or directly on the step that you want to go) and once you've finished click on Update product. Note that for start selling an offering that includes the product specification you will be required to change its status to LaunchedLaunched.

Note
Foron digital products it is not allowed tothe update theproduct versionview usingyou thiscan form. Instead it is required to followverify the processproduct's for upgrading the product version.
The basic information of the product specification is not the only information that can be updated, but it is also possible to update the Attachments and the Relationshipscertificates by clicking of the relatedVerify tab.Certificates button.
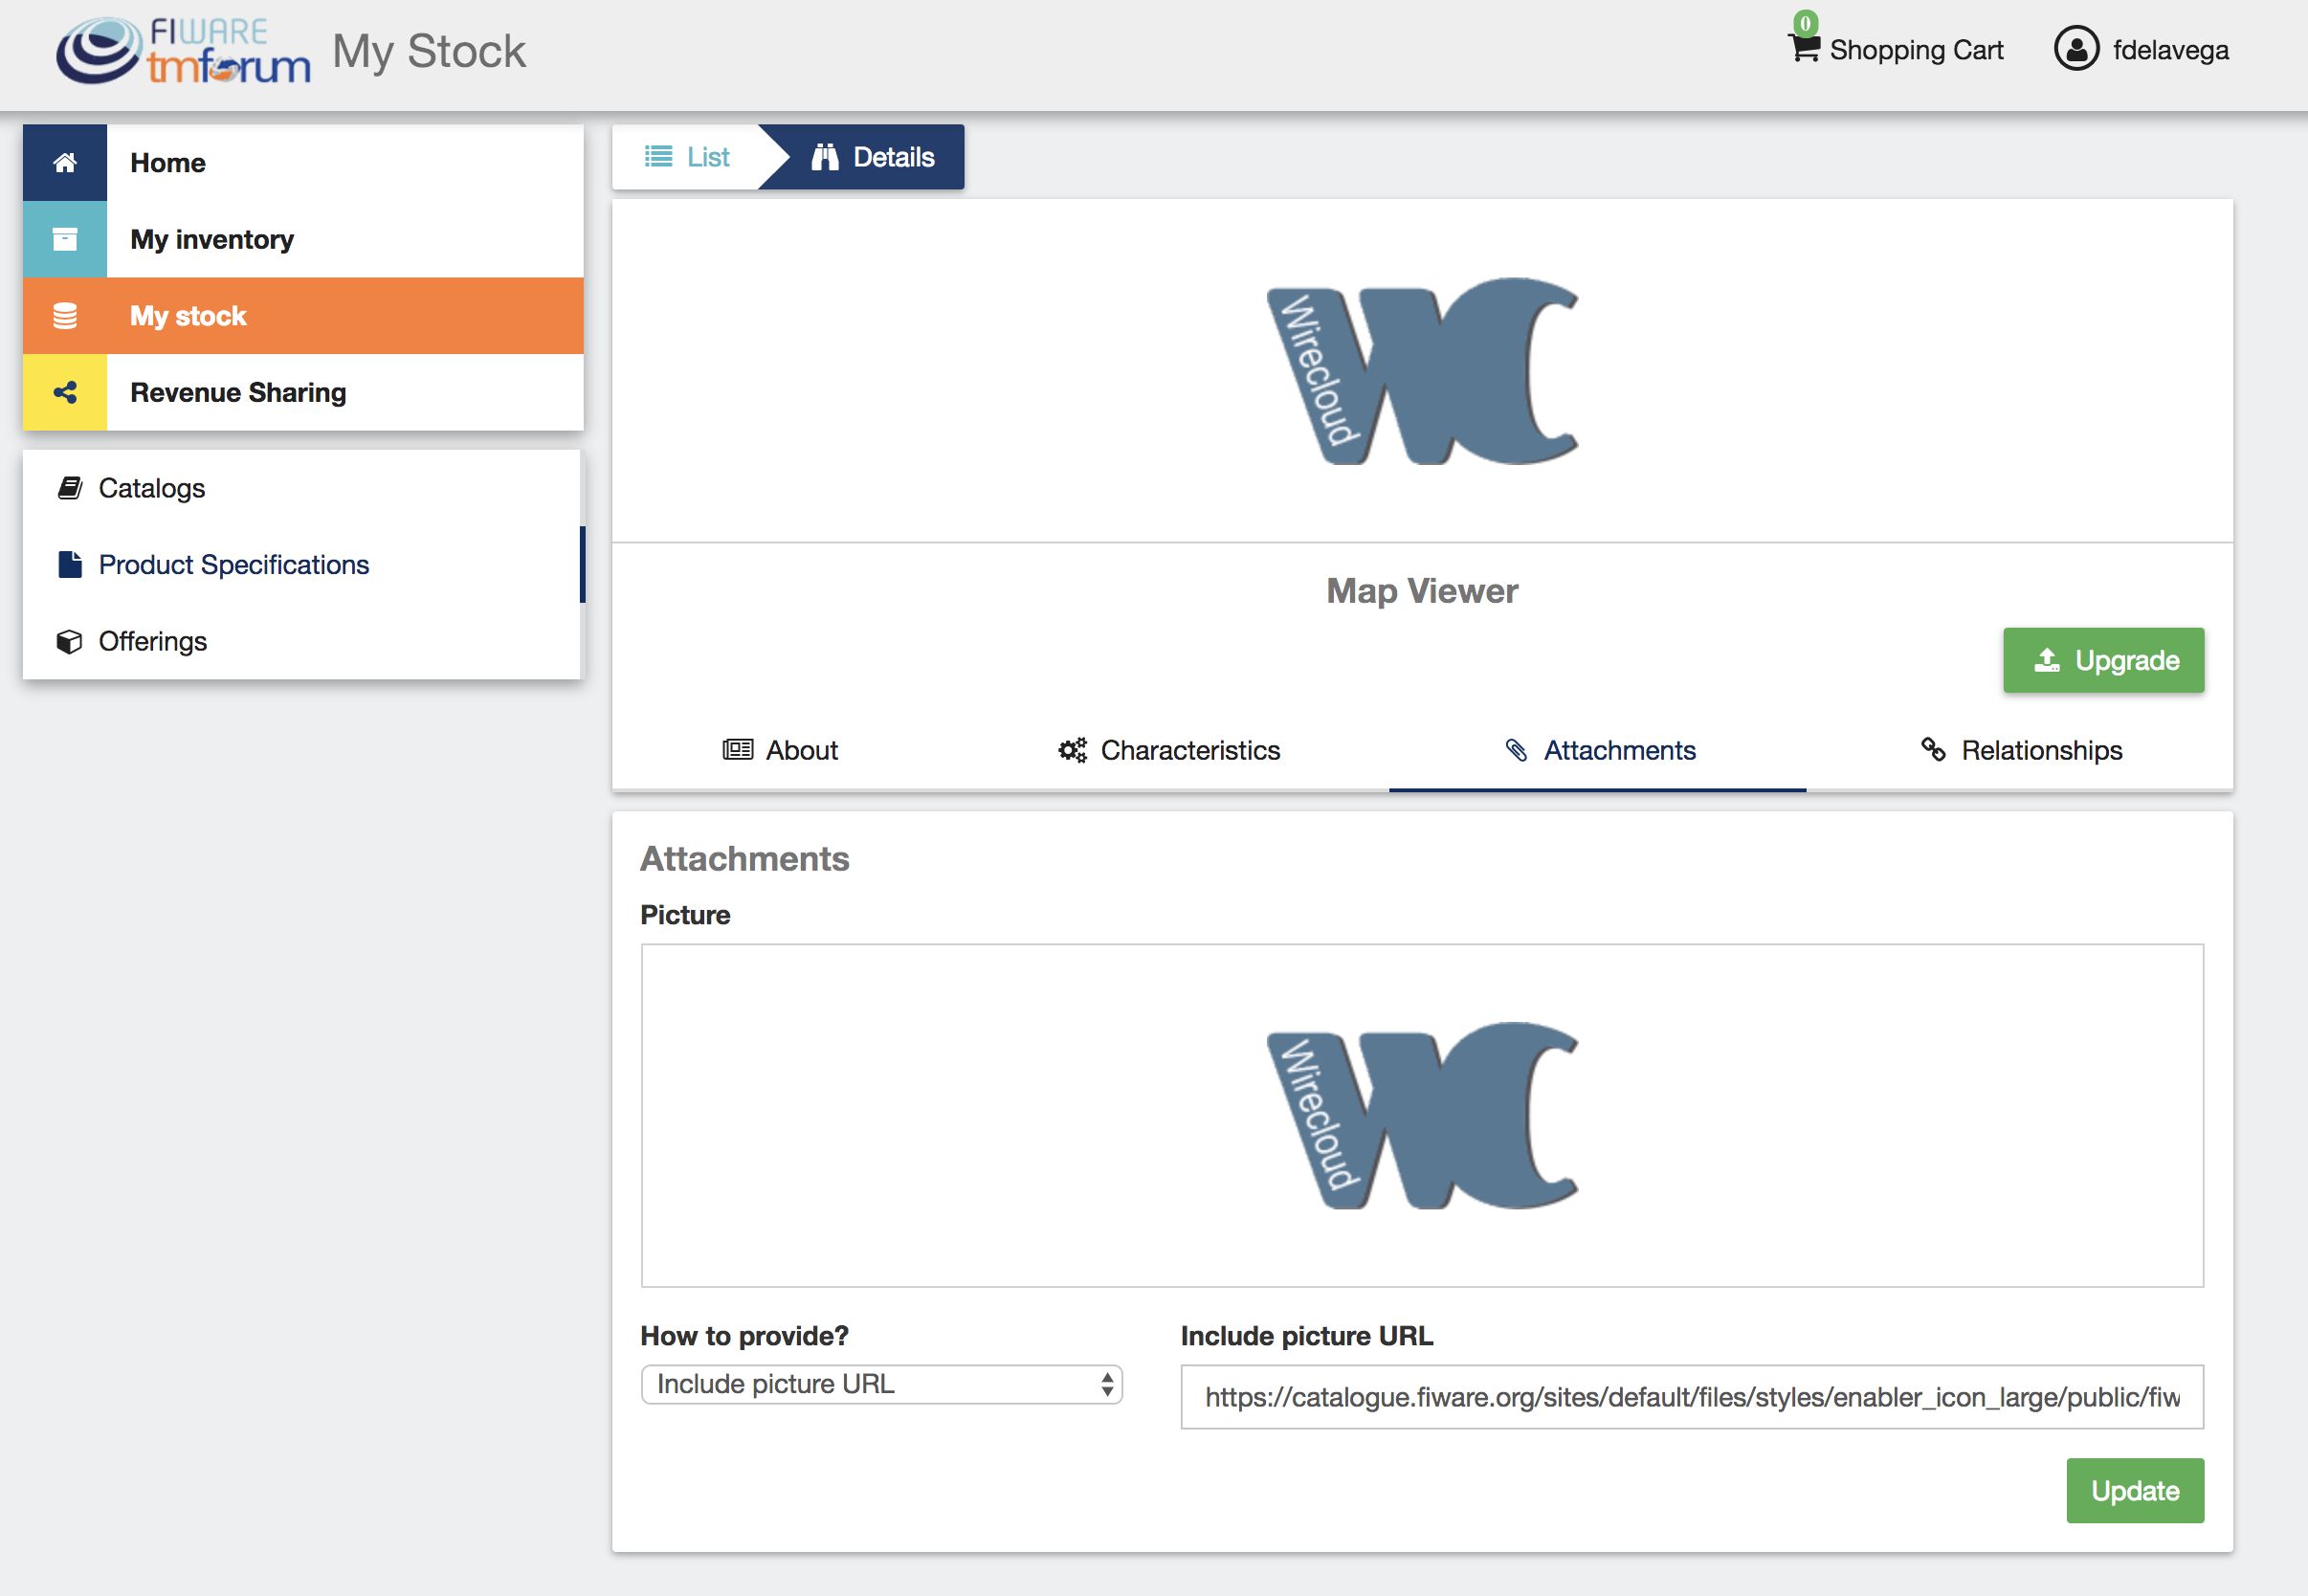
The displayed details form can be used for digital products specifications in order to provide new versions of the digital assets being offered. This can be done by clicking on Upgrade.
In the displayed form, it is required to include a new version for the product specification and to provide the new digital asset to be offered.

Note
All the customers who have acquired an offering including the current product specification will be able to access to the new version of the digital asset.